MYGDEX Prime is a premium account which provides pickup service to corporate sellers. The good news is shipping label printing feature for myGDEX Prime is now available! With this Shipping Label Printing (MYGDEX Prime), it helps you in fulfilling orders and print shipping label directly in one place!
This feature is only available in Unicart Business Gold Plan and above.
Step 1: Register myGDEX Prime account
Step 2: Perform Integration
Step 3: Create Pickup
Step 4: Arrange Shipment & Add to Pickup
Step 5: Print GDEX Shipping Label
Step 1: Register myGDEX Prime account
1. Go to myGDEX Prime website and register an account.
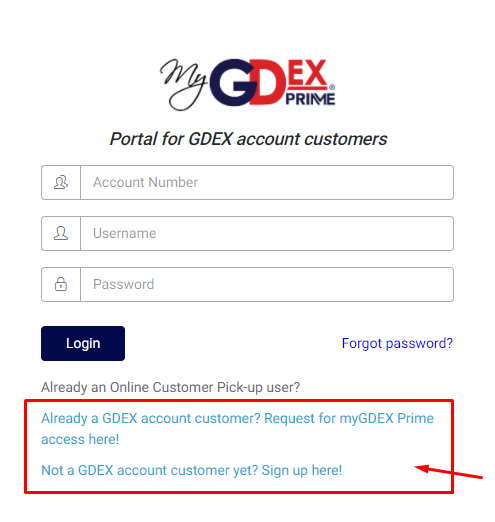
2. Login to your myGDEX Prime account and consult the myGDEX Team to get the Token for integration.
Step 2: Perform Integration
1. Go to Unicart Administration Panel, then navigate to Order menu and choose Fulfillment. Then, manage the Shipping Label Printing (MYGDEX PRIME).
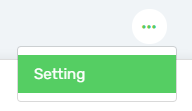
2. Click on the More button at the right top, and select Setting.
3. Fill in the Sender Setting.
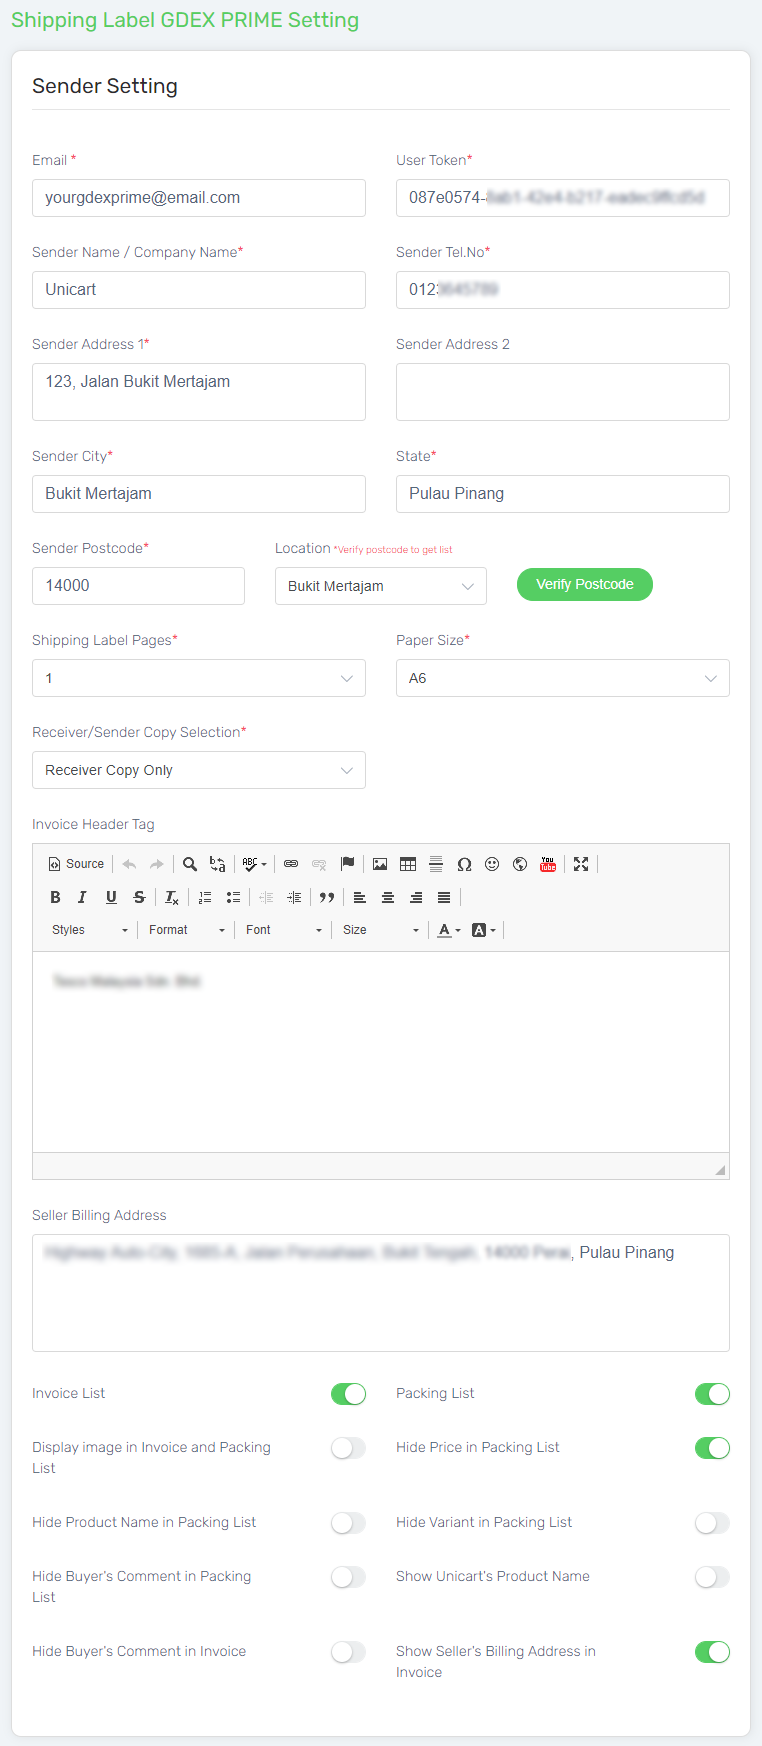
(i) Fill in the Email of your myGDEX account.
(ii) Paste the User Token which gets from myGDEX Prime account.
(iii) Insert your Sender Name / Company Name, Sender Telephone No, Sender Address, City, State, Postcode.
(iv) After Postcode is fill in, click the Verify Postcode button to get the Location.
(v) Choose the Shipping Label Pages and Paper Size, for example, 1 copy of A4 (Twin Page), A5 and A6.
(vi) Select whether to print Receiver or Sender Copy.
(vii) Invoice Header Tag: Design your Invoice Header with Store details or Store logo image.
(viii) Seller Billing Address: Fill the billing address where would be used at the Invoice.
(ix) Enable the Packing List and Invoice based on your printing preference, it will be printed along with your Shipping Label of each order accordingly. The Packing List is also customizable to display or hide certain product details. (Price, Product Name, Variant, Buyer’s Comment, etc.)
(x) Show Unicart’s Product Name: Your products may have different name in Unicart or marketplace. Please enable this if your product name in Unicart is easier to identify the products.
(xi) Then, you may choose whether or Show Seller’s Billing Address in Invoice.
4. Save the settings.
![]()
Step 3: Create Pickup
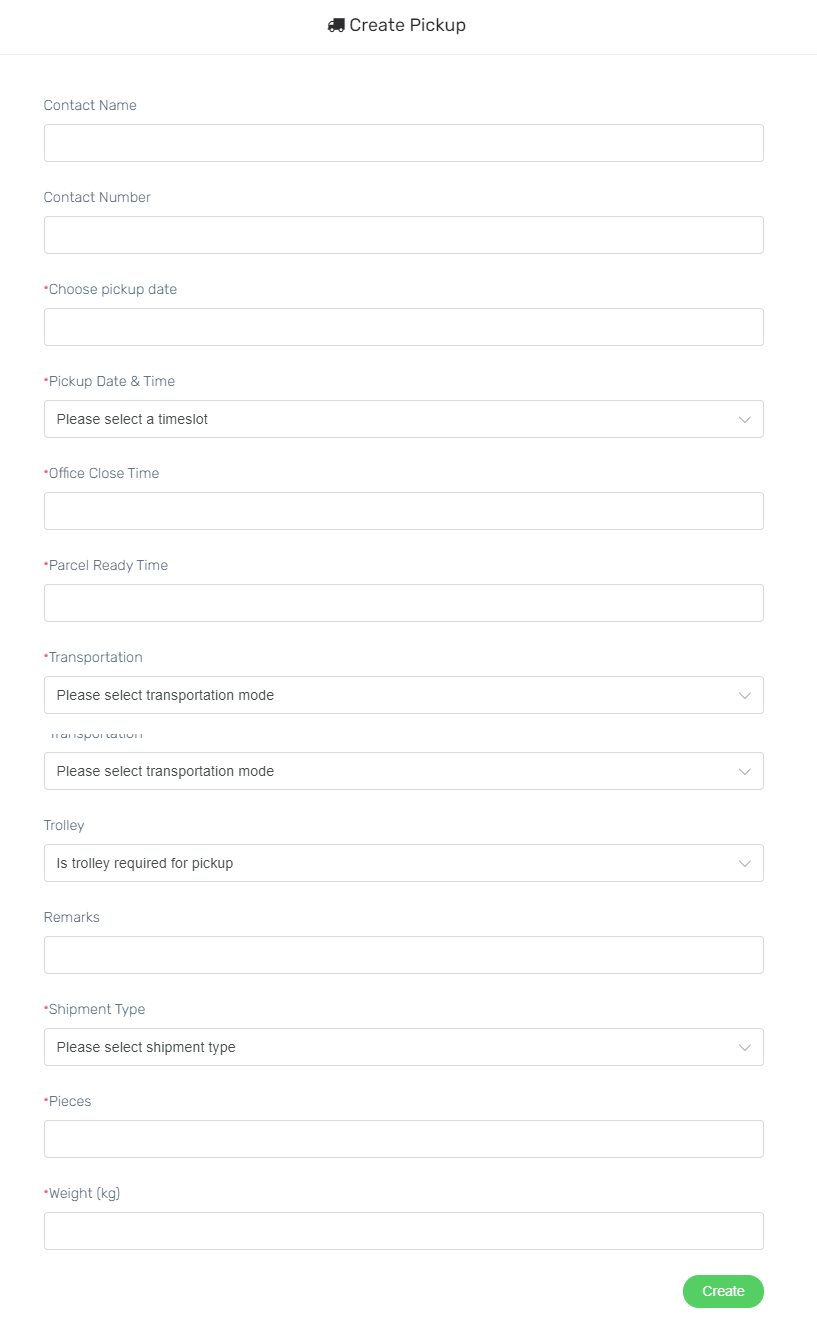
1. Click on the Create Pickup button at the right top.

2. Fill up the Pickup details, and click the Create button.
3. Then, you may click the View Pickup button to check on your pickup information.
![]()
4. You can refer to the GDEX Pickup Number for each pickup details.

Step 4: Arrange Shipment & Add to Pickup
1. At the Pending tab, select the order that you want to arrange shipment.
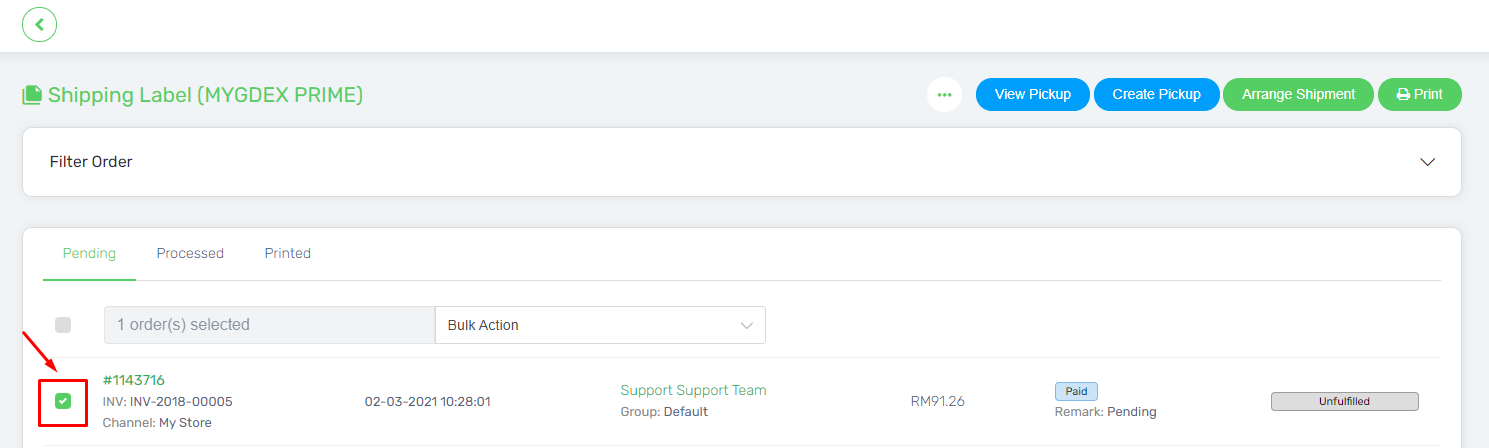
2. Then, click on the Arrange Shipment button at the right top.
![]()
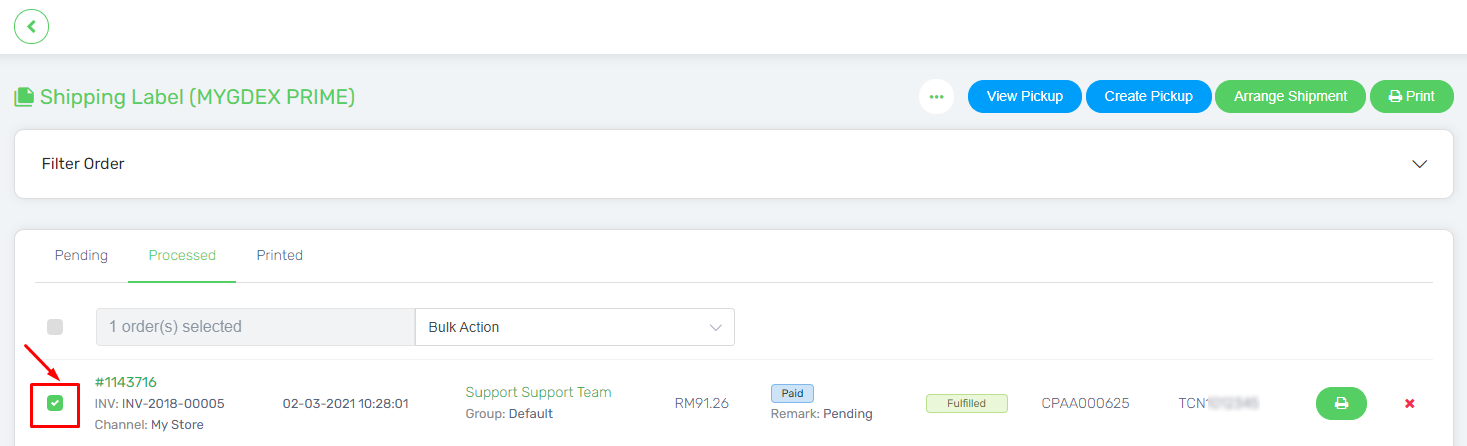
3. Order which had been arranged shipment will be moved to Processed tab, and the Tracking Number will be returned.
![]()
4. Select the order again, then choose Add to Pickup at the Bulk Action.
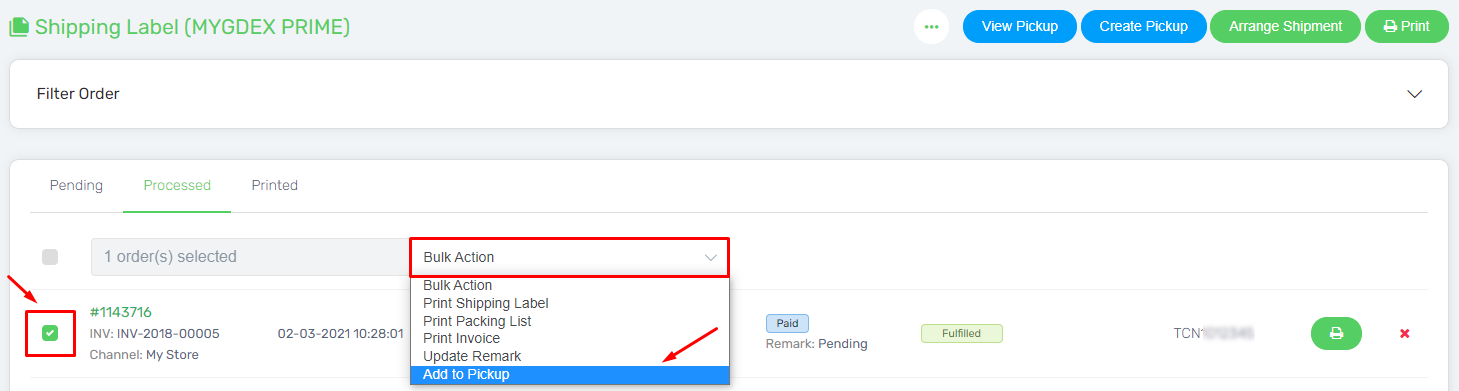
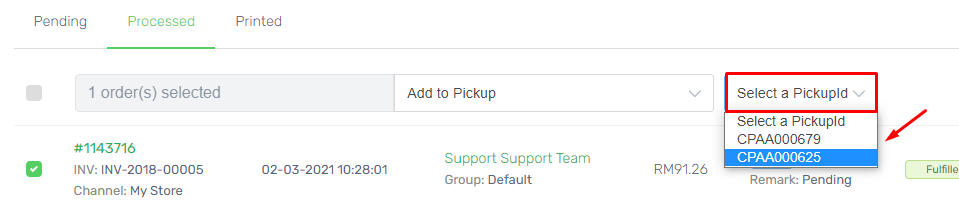
5. Select the Pickup ID based on the pickup information created in Step 3.
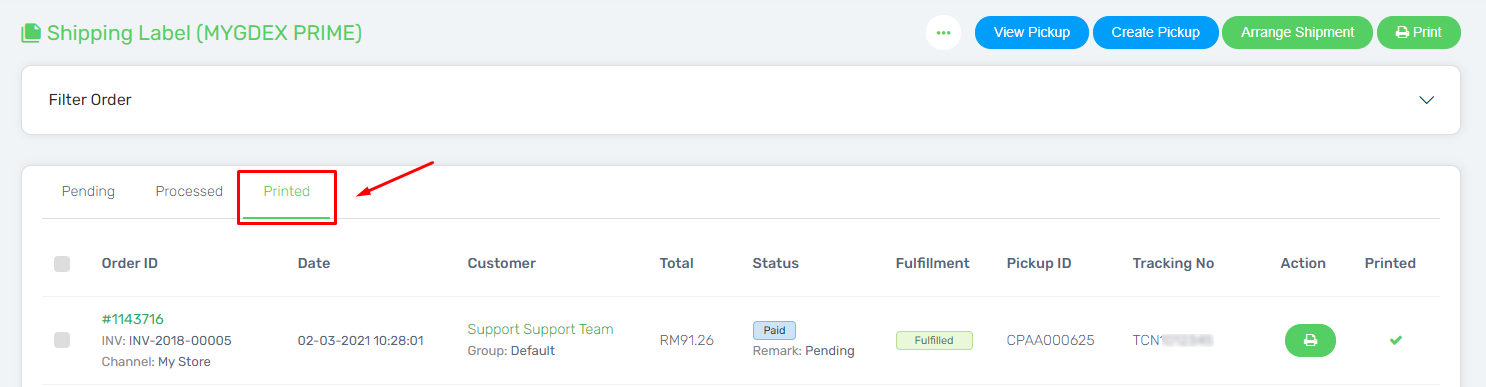
Step 5: Print GDEX Shipping Label
1. Tick the order from Processed tab that wish to proceed to print the GDEX shipping label.
2. Click on the Print button from the top right.
![]()
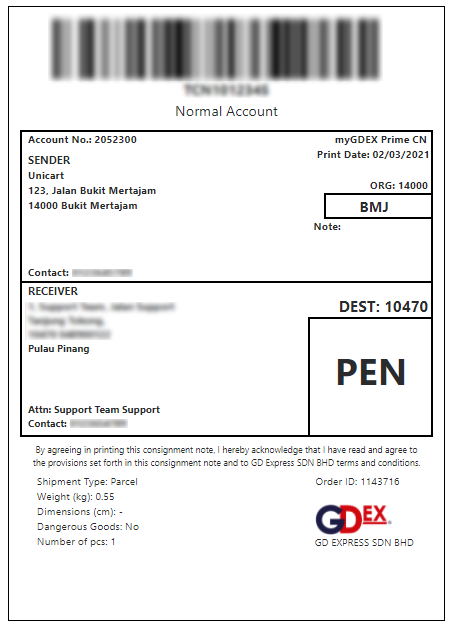
3. Then, the GDEX Prime Shipping Label will be generated for printing.
4. The order where the shipping label had been printed will be moved to the Printed tab.