Mailchimp is a leading marketing automation platform and provides email marketing service. Now you can connect your Unicart store with Mailchimp to automatically add subscribers to your Mailchimp List at signup. This function called Mailchimp Auto Registration. When you got customer data in Mailchimp, you can keep in touch with your customers by designing and sending newsletter from Mailchimp about your latest products, promotion and etc. Let’s go through steps below on how to configure Mailchimp Auto Registration.
This feature is only available in Unicart Pro Plan and above.
Step 1: Create Mailchimp Account
Step 2: Set up Mailchimp Audience
Step 3: Set up Mailchimp Integration
Step 4: Set up Mailchimp List Fields
Step 1: Create Mailchimp Account
1. Create an account with Mailchimp.
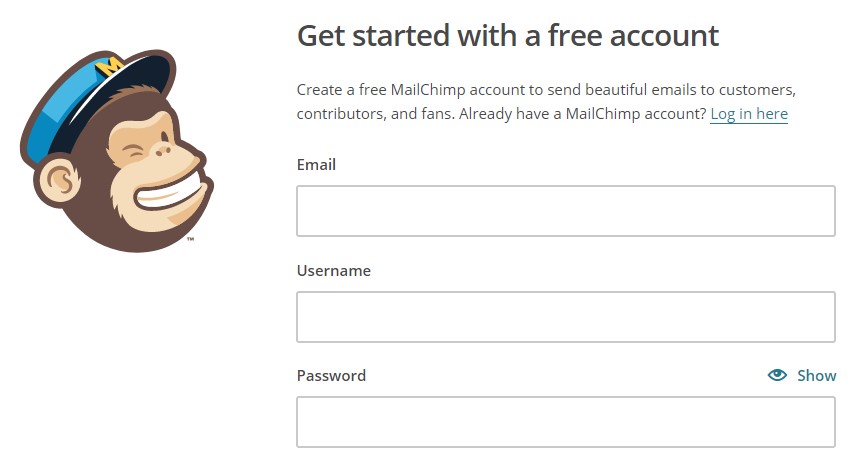
2. When you have Mailchimp account activated, login Mailchimp account.
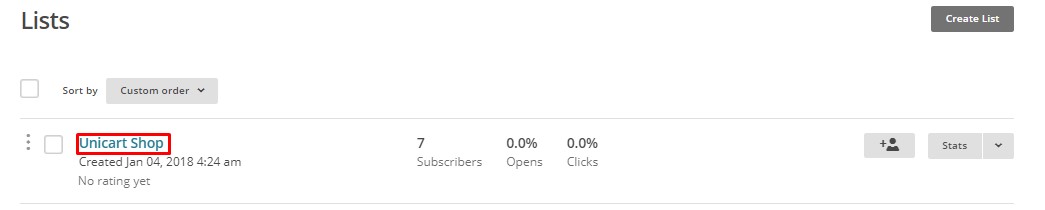
Step 2: Setup Mailchimp Audience
1. Navigate to Audience, then create Audience.

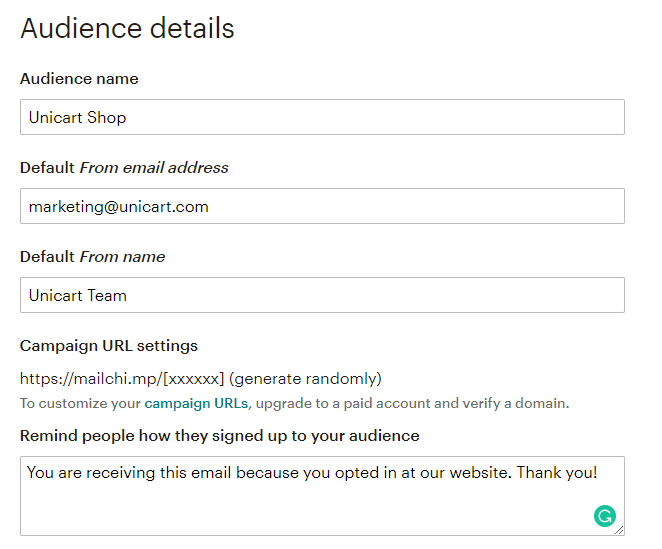
2. Enter the fields provided in Audience details section.
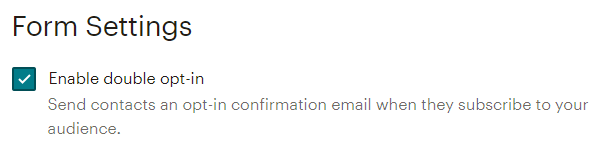
3. Enable Double opt-in to send a confirmation email to subscribers when they subscribe to your list.
Or, disable it to let subscriber added to your list straight away without confirmation.
4. Enter the email address and select the types of notification to receive from Mailchimp about the activity of your list
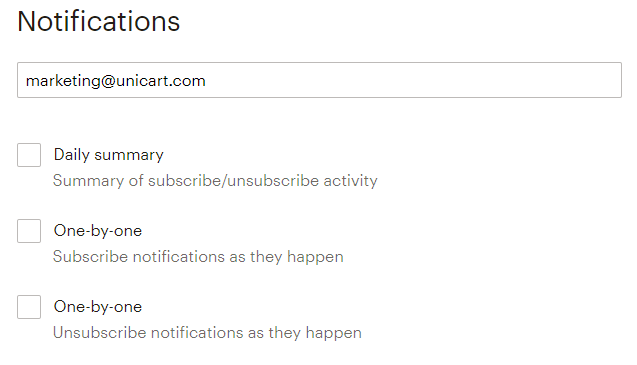
Click save after completed the Audience settings.
Step 3: Set up Mailchimp Integration
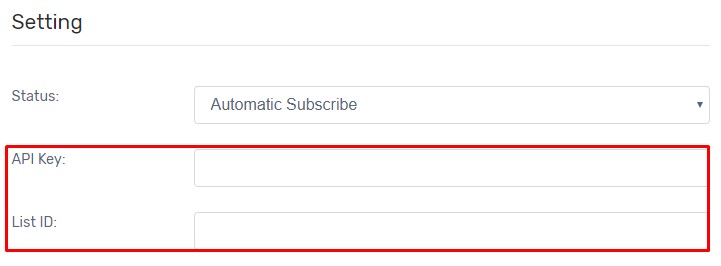
1. Login to your Unicart Admin Panel, go to Apps, click Add More Apps button and install Mailchimp Auto Registration.
2. API Key and List ID are required to setup the integration. Now we show you how to find these details from your Mailchimp account.
3. Find API Key
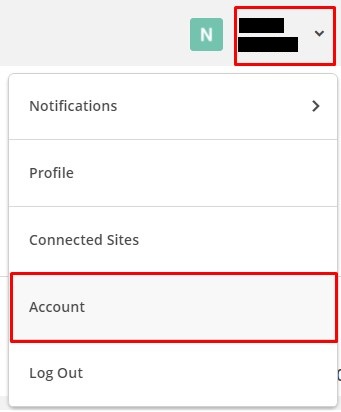
3.1. Click on your Name from the top right menu, and select Account.
3.2. From the Account Page, click Extras and choose API Keys.

3.3. Click Create A Key button and you will find API Key is generated.

4. Find Unique ID
4.1. Navigate to Audience Page, click the drop-down menu and choose Settings.
4.2. Scroll down to find Unique List ID.

5. Then, paste the API Key and List ID in Unicart.

Step 4: Set up Mailchimp List Fields
Fields are required to create in your Mailchimp list to map with Unicart customer fields later.
1. On the same Audience Settings Page, click Audience fields and *|MERGE|* tags.

There are two scenarios to set up fields in Mailchimp.
Scenario 1: Simplified Registration is Enabled
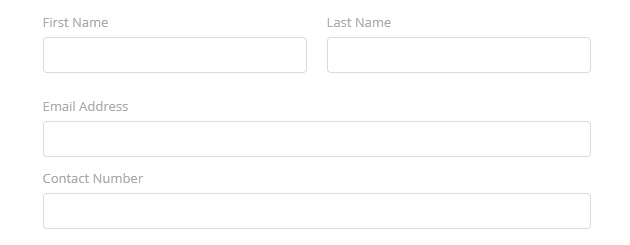
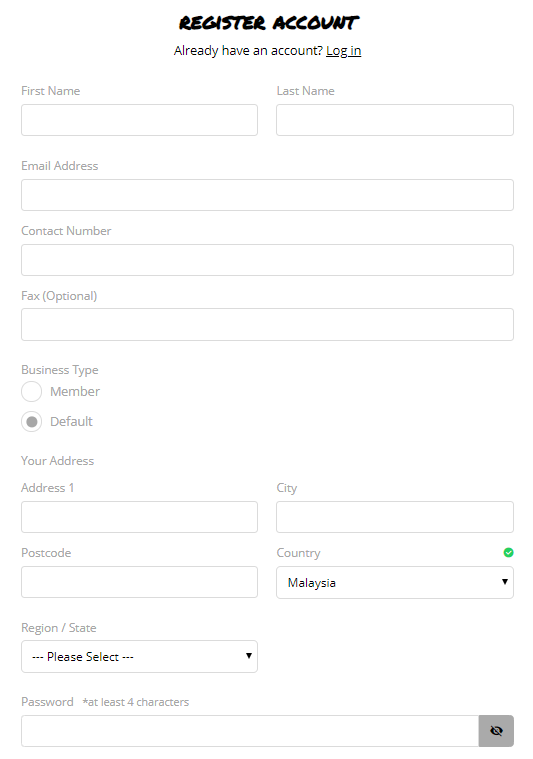
1.1. First Name, Last Name, Email address and Contact Number will be required only during customer registration.
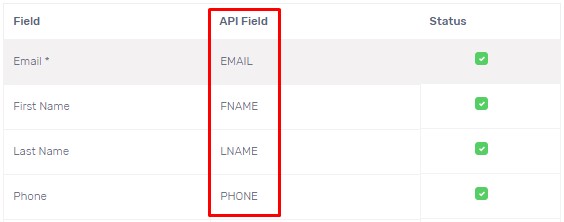
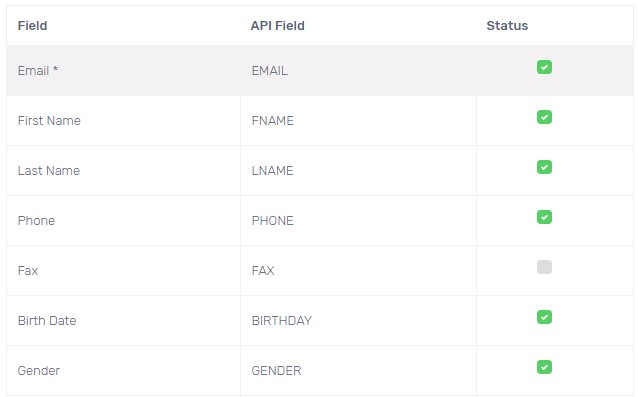
1.2. In Unicart’s Mailchimp Auto Registration Page, enable status of Email, First Name, Last Name and Phone. Please note that API Field will be used in Mailchimp later.
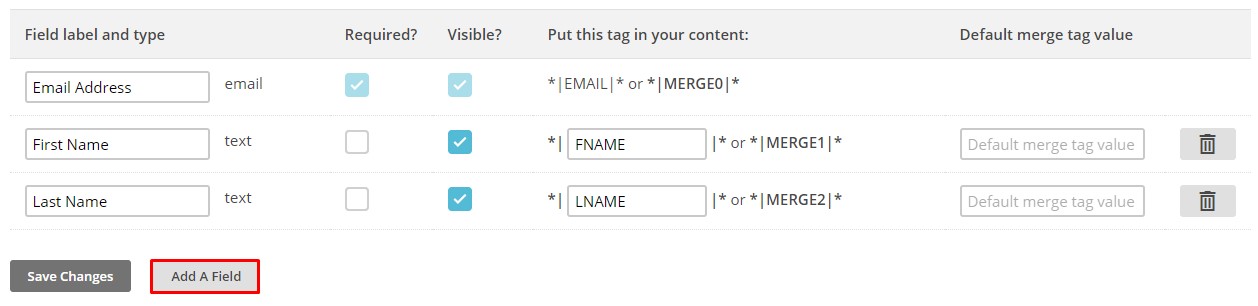
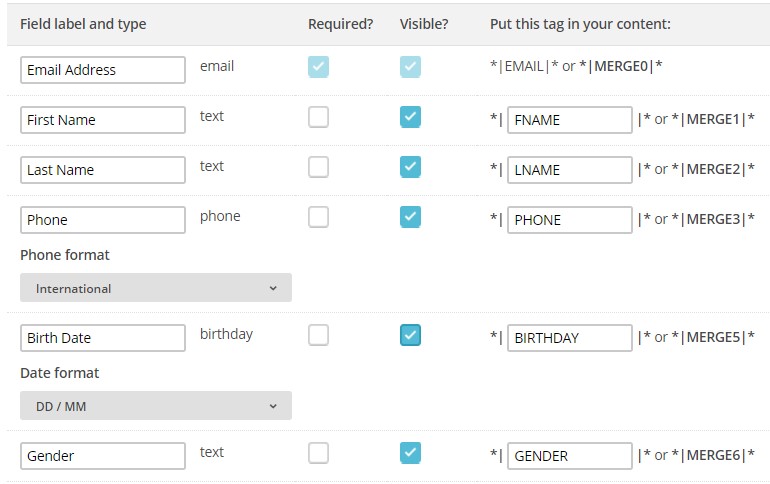
1.3. In Mailchimp’s Audience fields and *|MERGE|* tags Page, click Add A Field button.
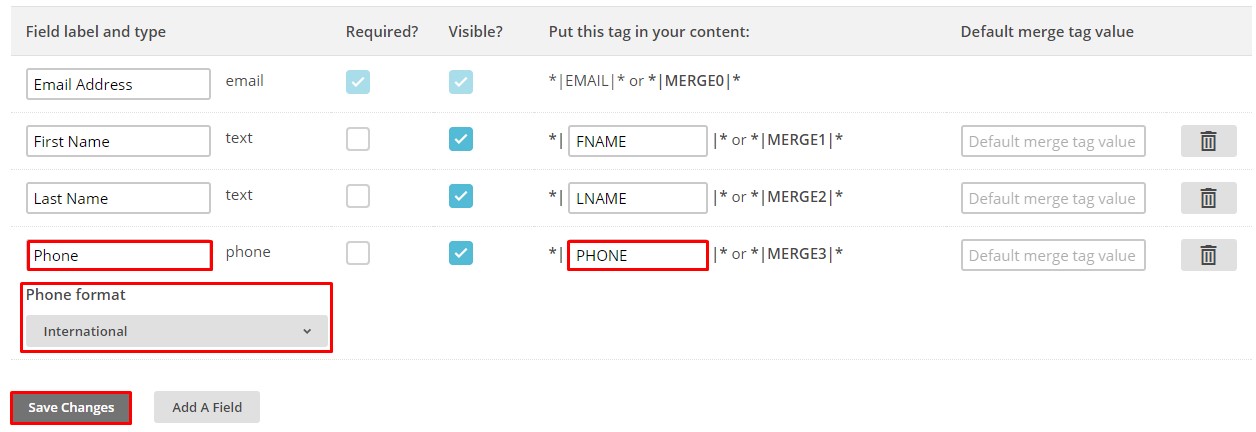
1.4. Click Phone field type to create Phone field.

1.5. Enter the field label, choose International as phone format, insert Unicart’s API field in tag field, and Save Changes.
Learn more about how to set Simplified Registration.
Scenario 2: Simplified Registration is Disabled
More data will be collected during customer registration.
2.1. In Unicart’s Mailchimp Auto Registration Page, enable whichever customer data you want to send to Mailchimp.
2.2. Configure the same as in Mailchimp, and Save Changes.
Congratulations! You have successfully auto subscribed customers to your newsletter and you can find customer details from your Mailchimp list.