
Billplz is one of the Malaysia Payment Gateway, and you can integrate Billplz with your UniCart store to collect payment instantly on your webstore now. For more information, you may refer to Billplz website.
Step 1: Register Billplz account
Step 2: Obtain Billplz API keys
Step 3: Set up Billplz integration
Step 4: Test checkout via Billplz
Step 1: Register Billplz account
1. Sign up a Billplz account.
2. Once your Billplz account is activated, log in to your Billplz account.
Step 2: Obtain Billplz API keys
There are 3 things to obtain from your Billplz account in order to integrate with your UniCart store, which are Collection ID, API Key and XSignature Key.
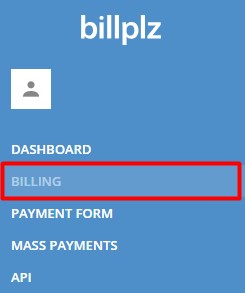
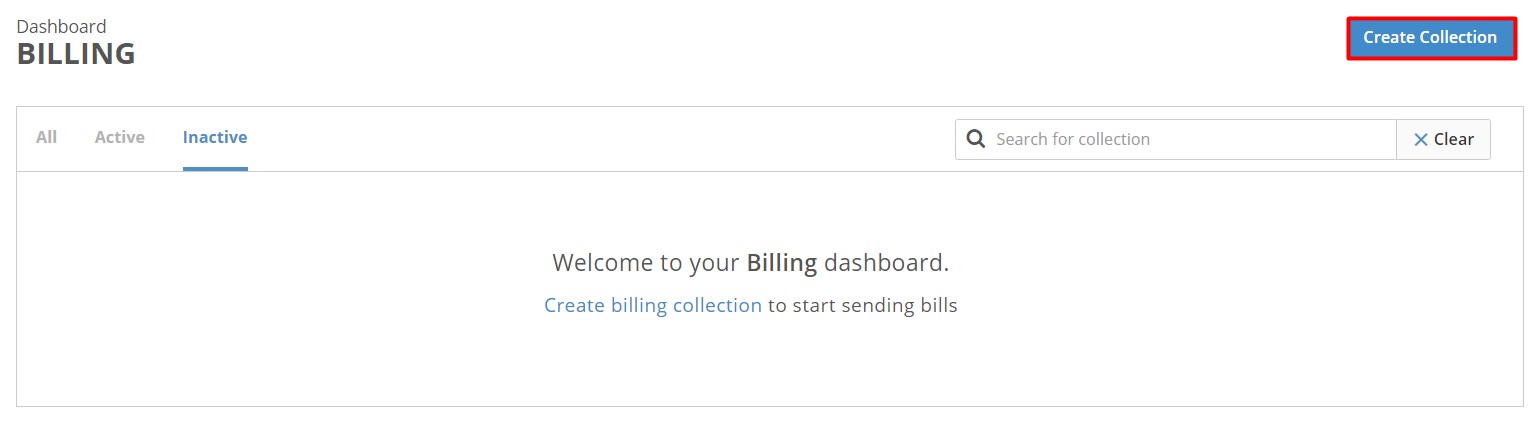
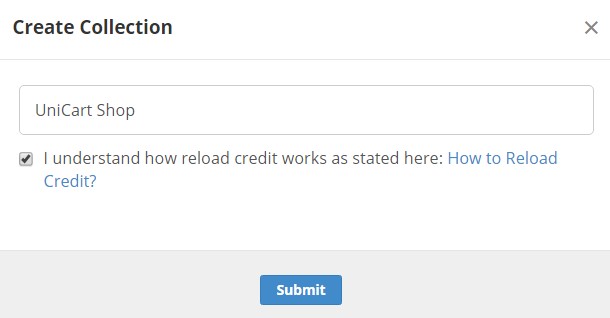
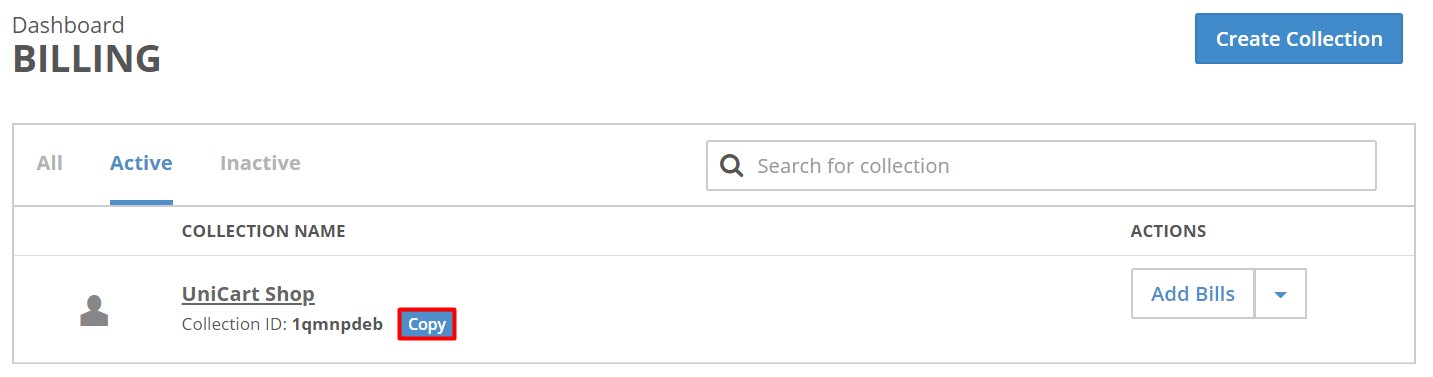
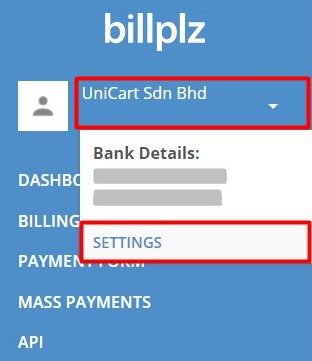
Part I: Billplz Collection ID
1. Navigate to Billing page.
2. Click Create Collection button.
3. Enter your preferred Collection name (eg: your store name), tick the checkbox and Submit.
4. Click Copy button to copy the created Collection ID and paste in your UniCart store later.
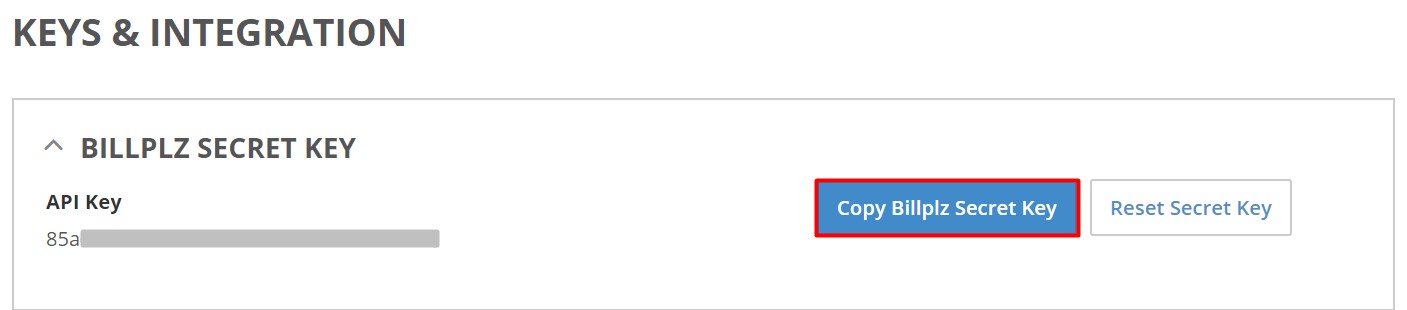
Part II: Billplz API Key
1. Click on your username and choose Settings.
2. Scroll down to find under Keys & Integration, click Billplz Secret Key and Copy Billplz Secret Key to paste in your UniCart store later.
Part III: Billplz XSignature Key
1. On the Billplz’s Settings page, under Keys & Integration, click XSignature Payment.
2. Tick Enable XSignature Payment Completion, and Save & Copy XSignature Key to paste in your UniCart store later.

Step 3: Set up Billplz integration
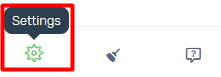
1. Log in to your UniCart store, click Settings from bottom left panel.
2. Choose Payment.

3. Click Add Payment on top.
![]()
4. Choose Billplz.

5. Paste the Billplz API Key, Collection ID, XSignature Key, and fill in the required detail.
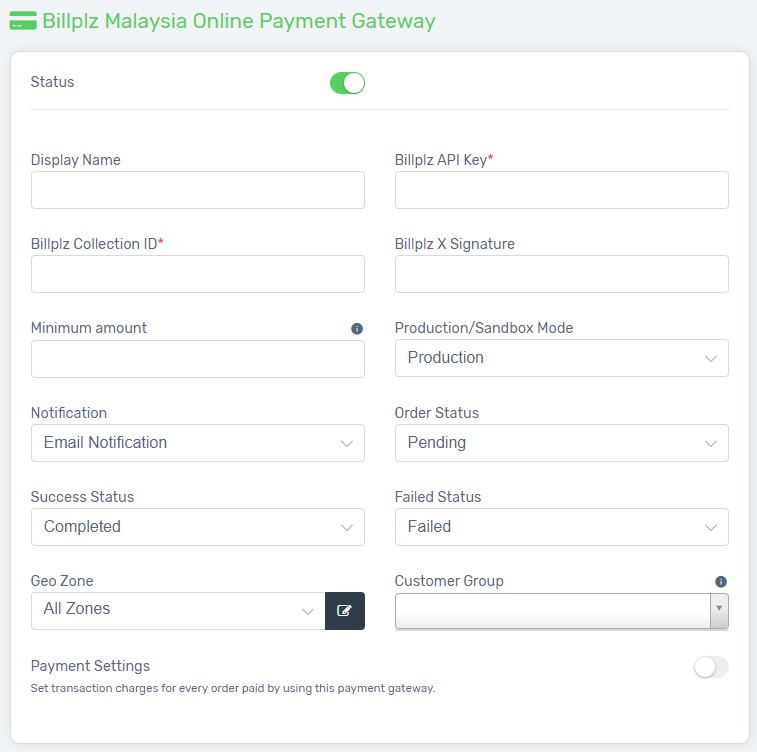
Display Name: The payment name to display during checkout process in Payment Method Step.
Minimum account: The minimum order amount that allows customers to use Billplz. For example: 0.1.
Mode*: Select Production.
Notification*: Select a notification mode.
3 Statuses*: These are the Callback status that Billplz would send to Unicart and reflect on order remark. Select a remark based on the status accordingly.
Customer Group: The Customer Group that entitled for this payment method. Leave it blank if you apply to all customers.
Geo Zone*: The customer location that can use Billplz.
Status*: Enable to make it live on your Unicart store.
Payment Settings: Enable to incur transaction charge to your customers.
6. When it is complete, click Install button.

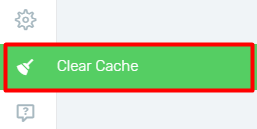
7. Click Clear Cache from bottom left panel to have changes on your Unicart store.
Step 4: Test checkout via Billplz
1. Try to make purchase via Billplz on your Unicart store to check if you have successfully redirected to Billplz page to proceed payment, to ensure a better customers’ checkout experience.
2. If you manage to reach to Billplz page to make payment, you have successfully integrated Billplz and Billplz is live on your Unicart store now. Congratulation!