Some customers don’t like to fill up registration form in order to place order with you. Facebook Connect enables your customers register and login with their Facebook account on your Unicart store. Adding Facebook Connect makes your customers convenient and skip the process of filling up fields in registration form. Once you activate it, as long as they already login to their Facebook account on their machine, Unicart will auto retrieve their Facebook profile information and register on your Unicart store.
Step 1: Create Facebook App
Step 2: Set up Facebook Connect
Step 3: Test Facebook Connect
Additional Information
1. Setup Valid OAuth Redirect URIs
2. Check Permissions and Features
3. Login with Mobile Phone
4. Add Platform to Restore Access
Step 1: Create Facebook App
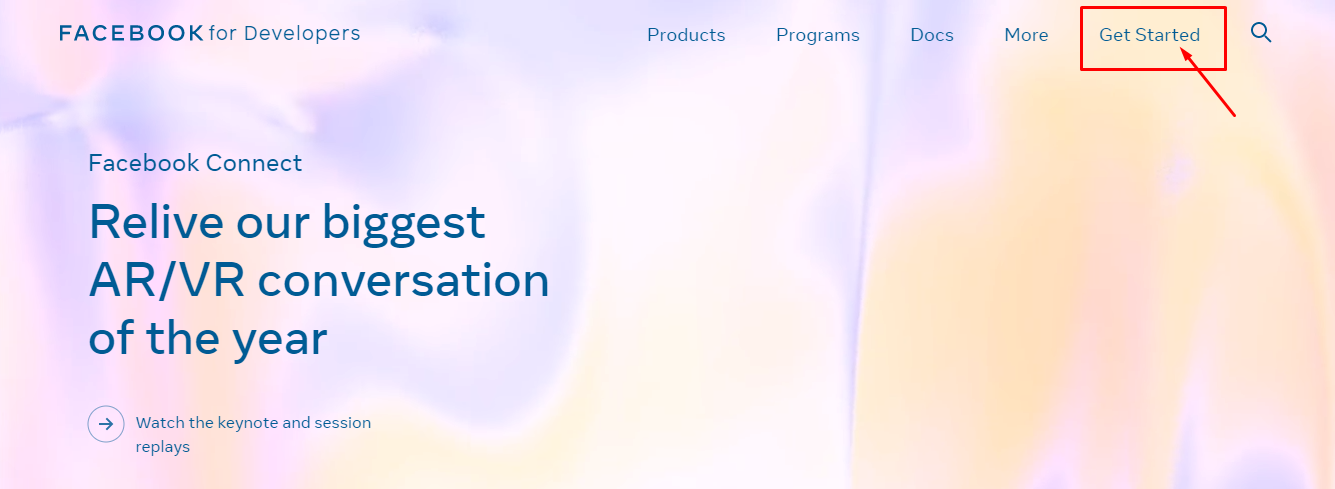
1. Firstly, you have to create a Facebook app from Facebook Developer.
2. Click on Get Started.
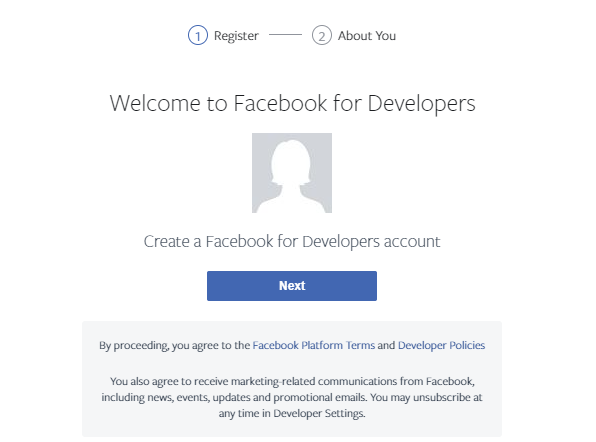
3. Proceed for the steps by clicking Next.
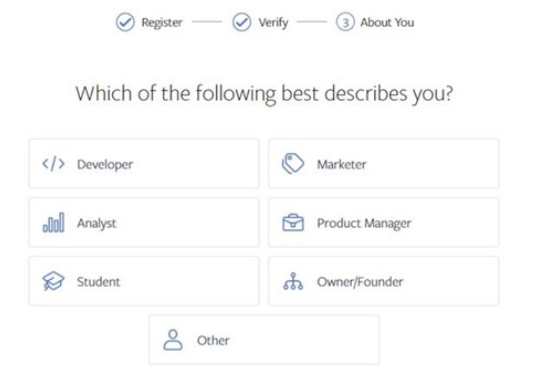
4. Choose the best description at About You.
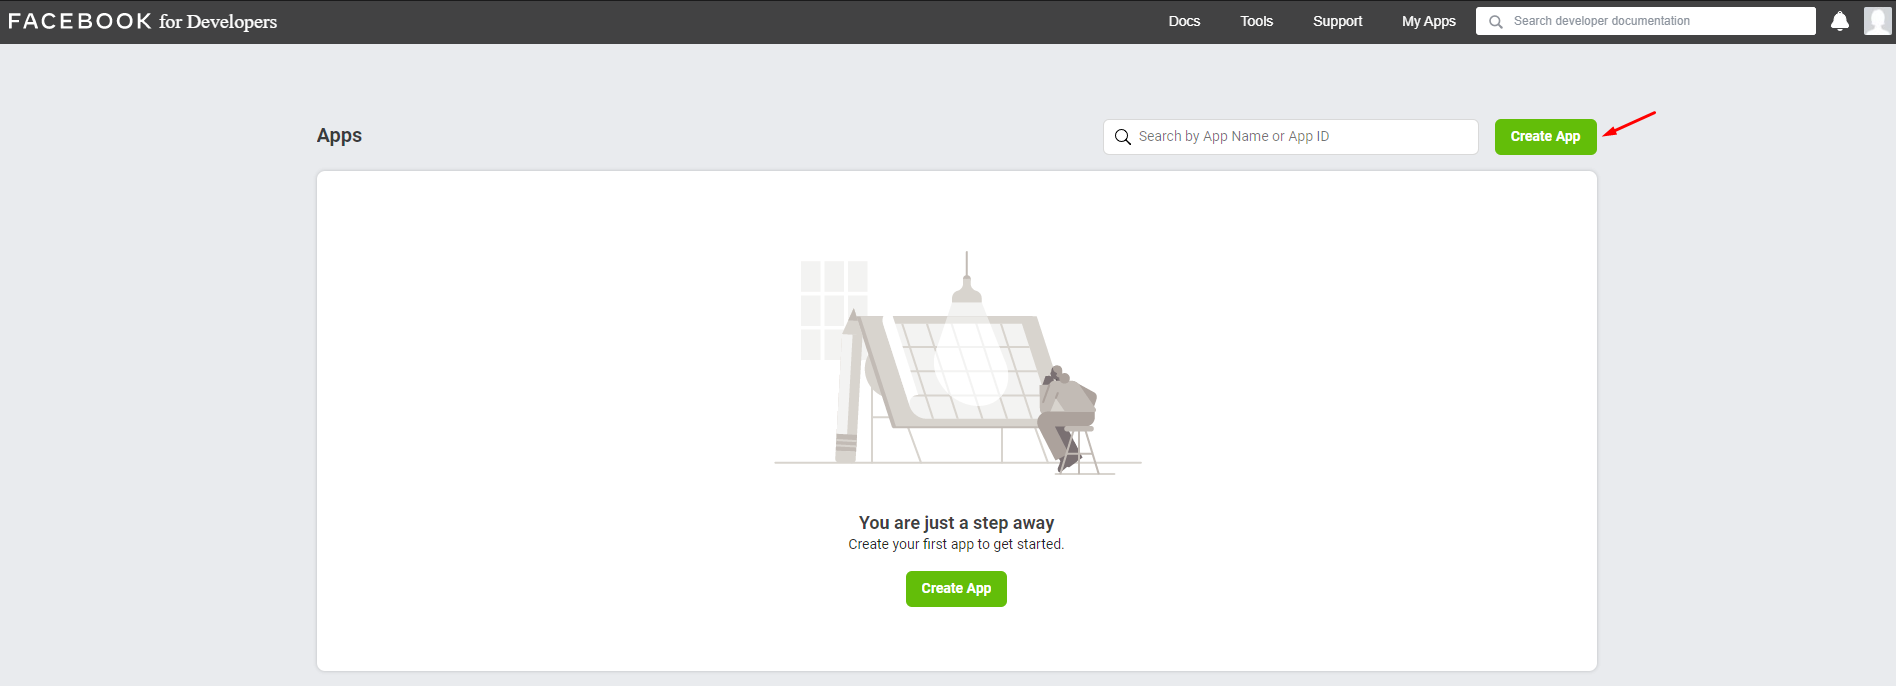
5. Continue on Facebook Developer Apps and Create App.
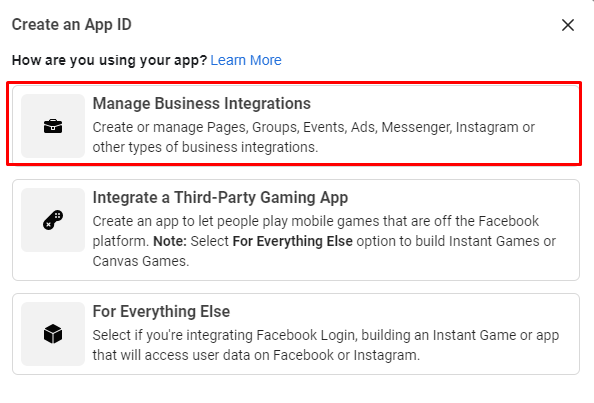
6. Select Manage Business Integrations.
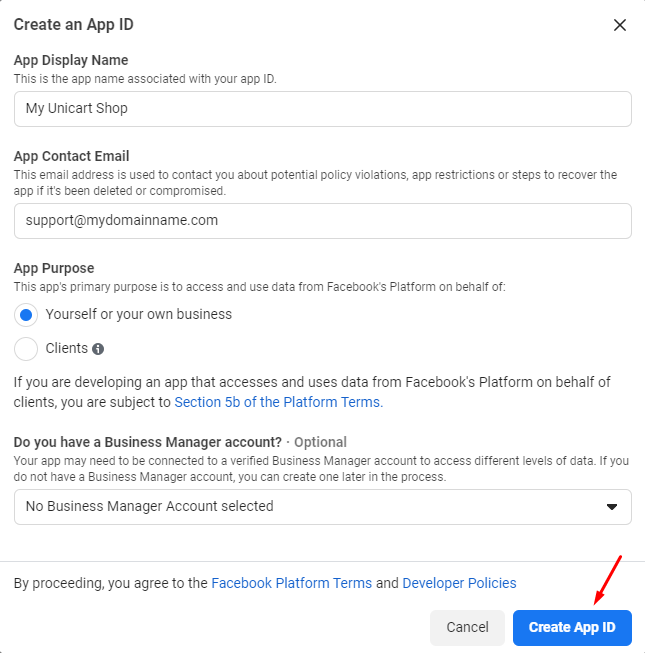
7. Fill in the App Display Name & App Contact Email. Thus, select the App Purpose and click on Create App ID to continue.
8. Go to the Settings menu and choose Basic.
9. Insert your Unicart domain name in the App Domains field.
10. Insert Privacy Policy URL & Terms of Service URL which you can get the URL link from your Unicart store footer.
11. Select the Category & App Icon of your online business, then Save Changes.

Step 2: Set up Facebook Connect
1. Copy App ID and App Secret (show) from Facebook app.

2. Login to Unicart Admin Panel, navigate to Facebook and choose Facebook Connect.

3. Paste the details, enable the status, click Save and Clear Cache button.

Step 3: Test Facebook Connect
1. Ensure that your computer is log in with Facebook user account.
2. Try to register an account with Facebook Login.
Congratulation! Success Facebook Connect will prompt a Facebook window with the Display Name, to request confirmation of receiving Facebook profile information.

Additional Information
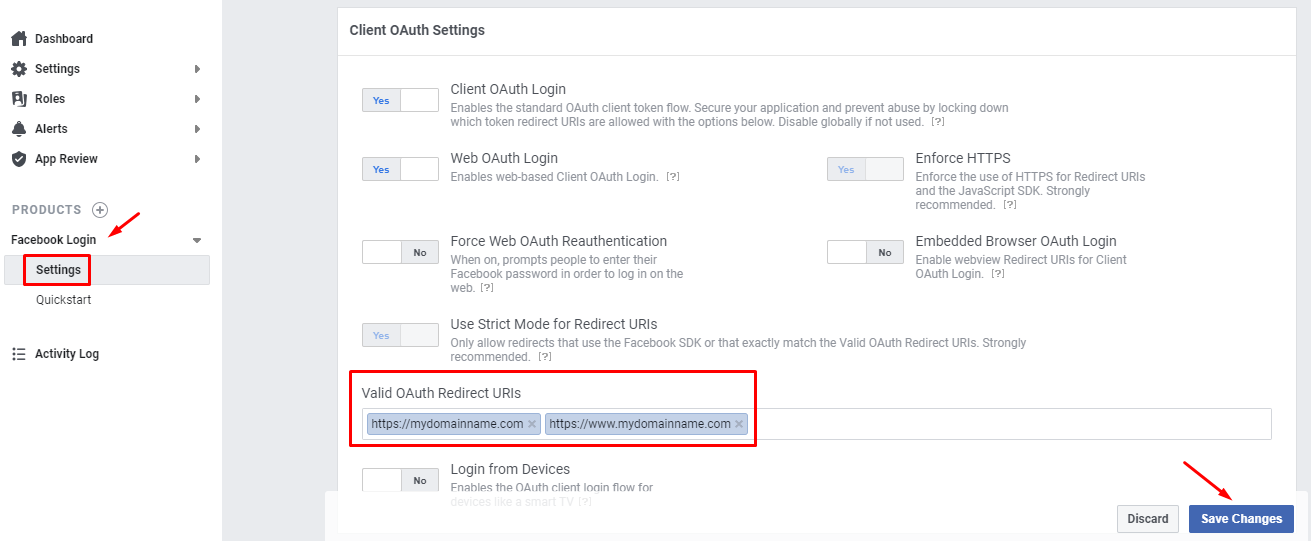
1. Setup Valid OAuth Redirect URIs
After you have done the Facebook Connect Setup, and you received the error “Feature unavailable. Facebook is currently unavailable for this apps.” during the Facebook Login at your webstore. Then, you may go to the Facebook Developer and configure the setting for Valid OAuth Redirect URIs.
From Facebook Login at the PRODUCTS menu, then choose Settings. After that, fill up your domain name at the field of Valid OAuth Redirect URIs.
Lastly, save all the changes.
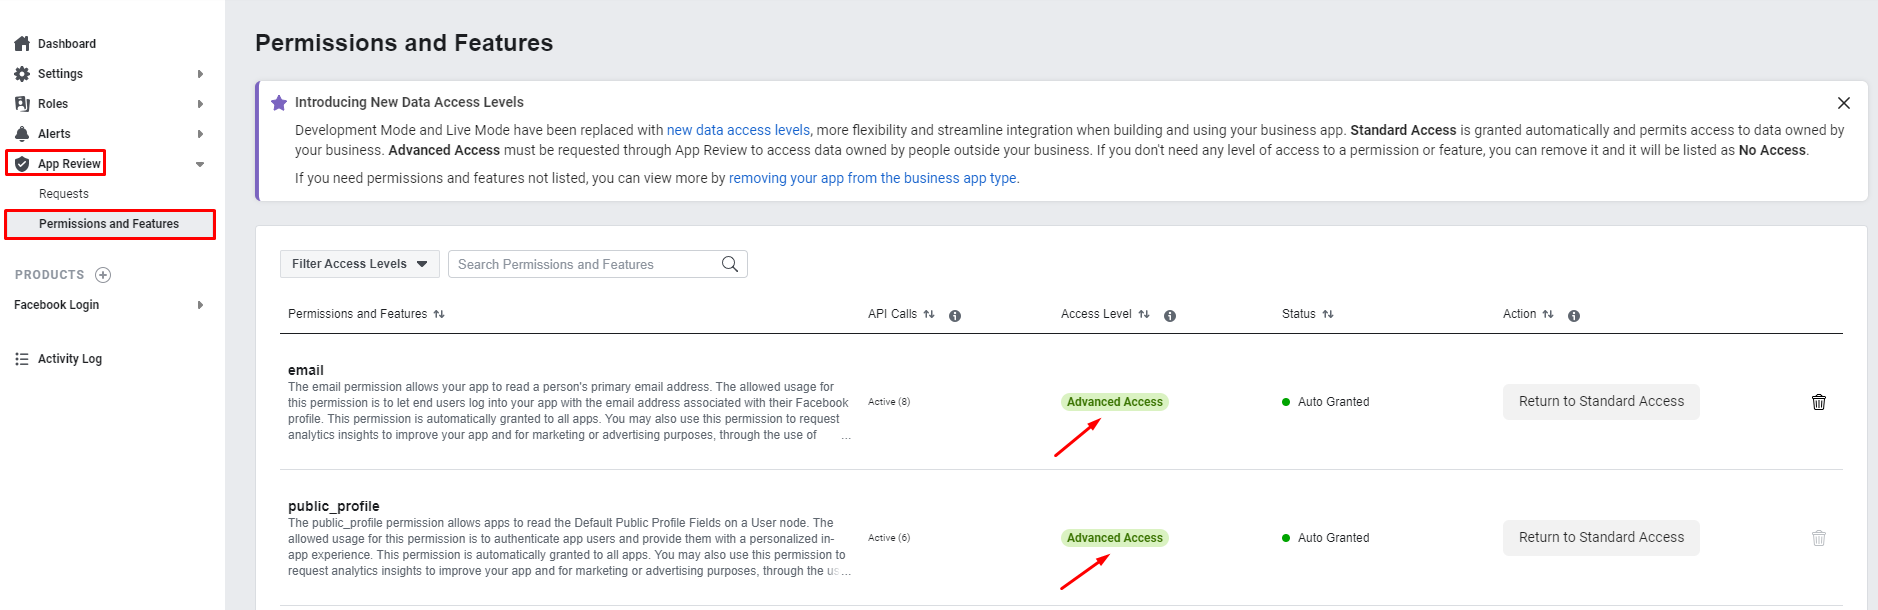
2. Check Permissions and Features
If you receive the error message “Email is required for facebook login” during the login session from Facebook at your Unicart webstore. Kindly check on the settings of Permissions and Features from Facebook Developer‘s Apps.
From the App Review menu, choose Permissions and Features. Then, update the Access Level of “email” and “public_profile” to become Advanced Access, by click on the Request Advanced Access button at the Action.
3. Login with Mobile Phone
To make sure that your customer can log in with Facebook from the mobile web browser, you may go to the Facebook Developer and configure the setting for Valid OAuth Redirect URIs.
From Facebook Login at the PRODUCTS menu, then choose Settings. After that, fill up your domain name with /login, /register and /checkout behind in the field of Valid OAuth Redirect URIs.
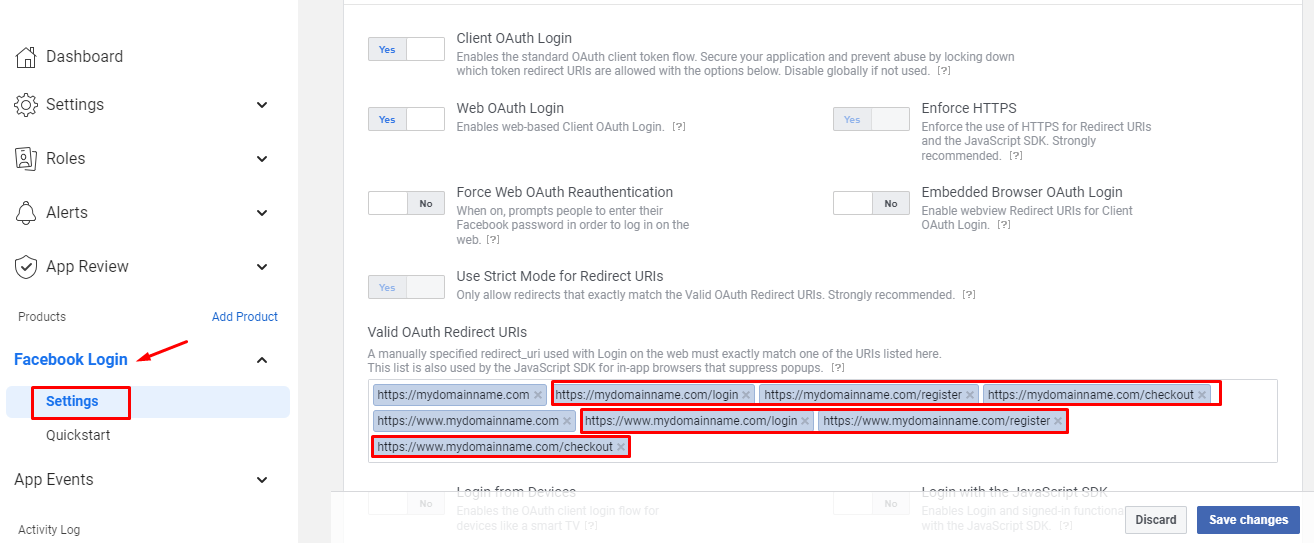
For example:
https://mydomainname.com
https://mydomainname.com/login
https://mydomainname.com/register
https://mydomainname.com/checkout
https://www.mydomainname.com
https://www.mydomainname.com/login
https://www.mydomainname.com/register
https://www.mydomainname.com/checkout
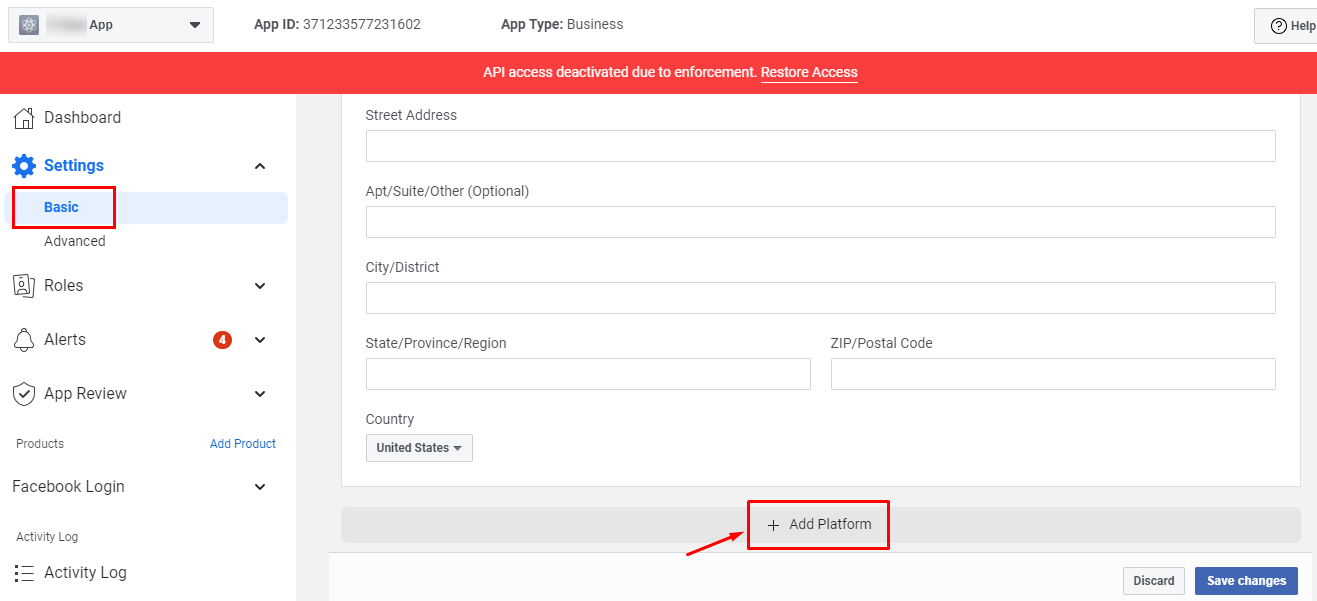
4. Add Platform to Restore Access
If you are facing the error message showing “API access deactivated due to enforcement. Restore Access“, you may then scroll to the most bottom and ‘Add Platform‘ from the Settings’ Basic menu.
After that, choose ‘Website‘ as the platform and click ‘Next‘.

Next, insert your website domain name at the Site URL, and click the ‘Save changes‘ button.

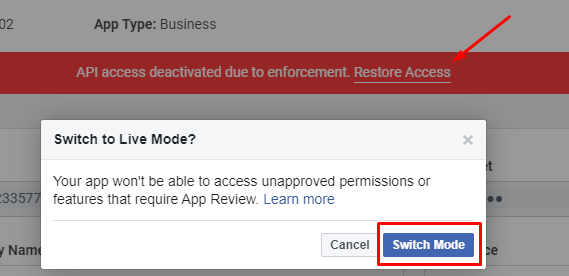
Then, click on Restore Access and choose ‘Switch Mode‘.
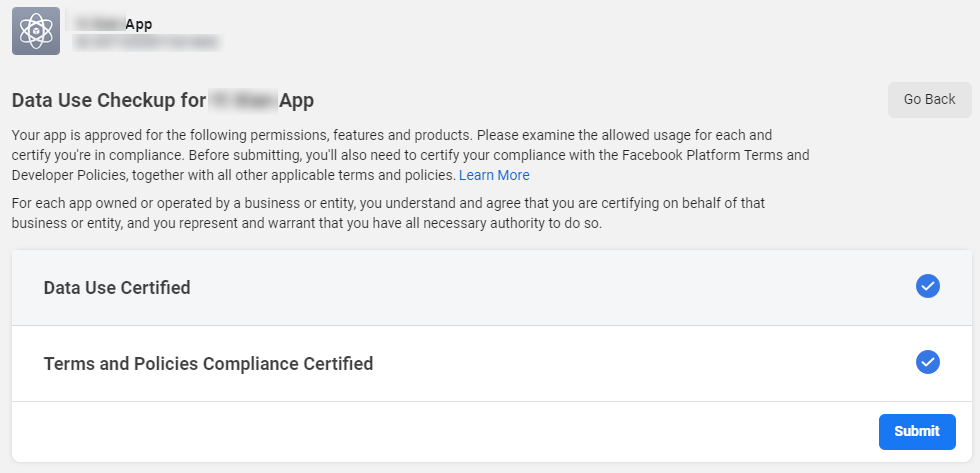
Finally, click on the Start Checkup at the error message at the top, hence ‘tick‘ all the terms and policies required for Facebook App’s Data Use Checkup and then ‘Submit‘. Thus, you are all done.