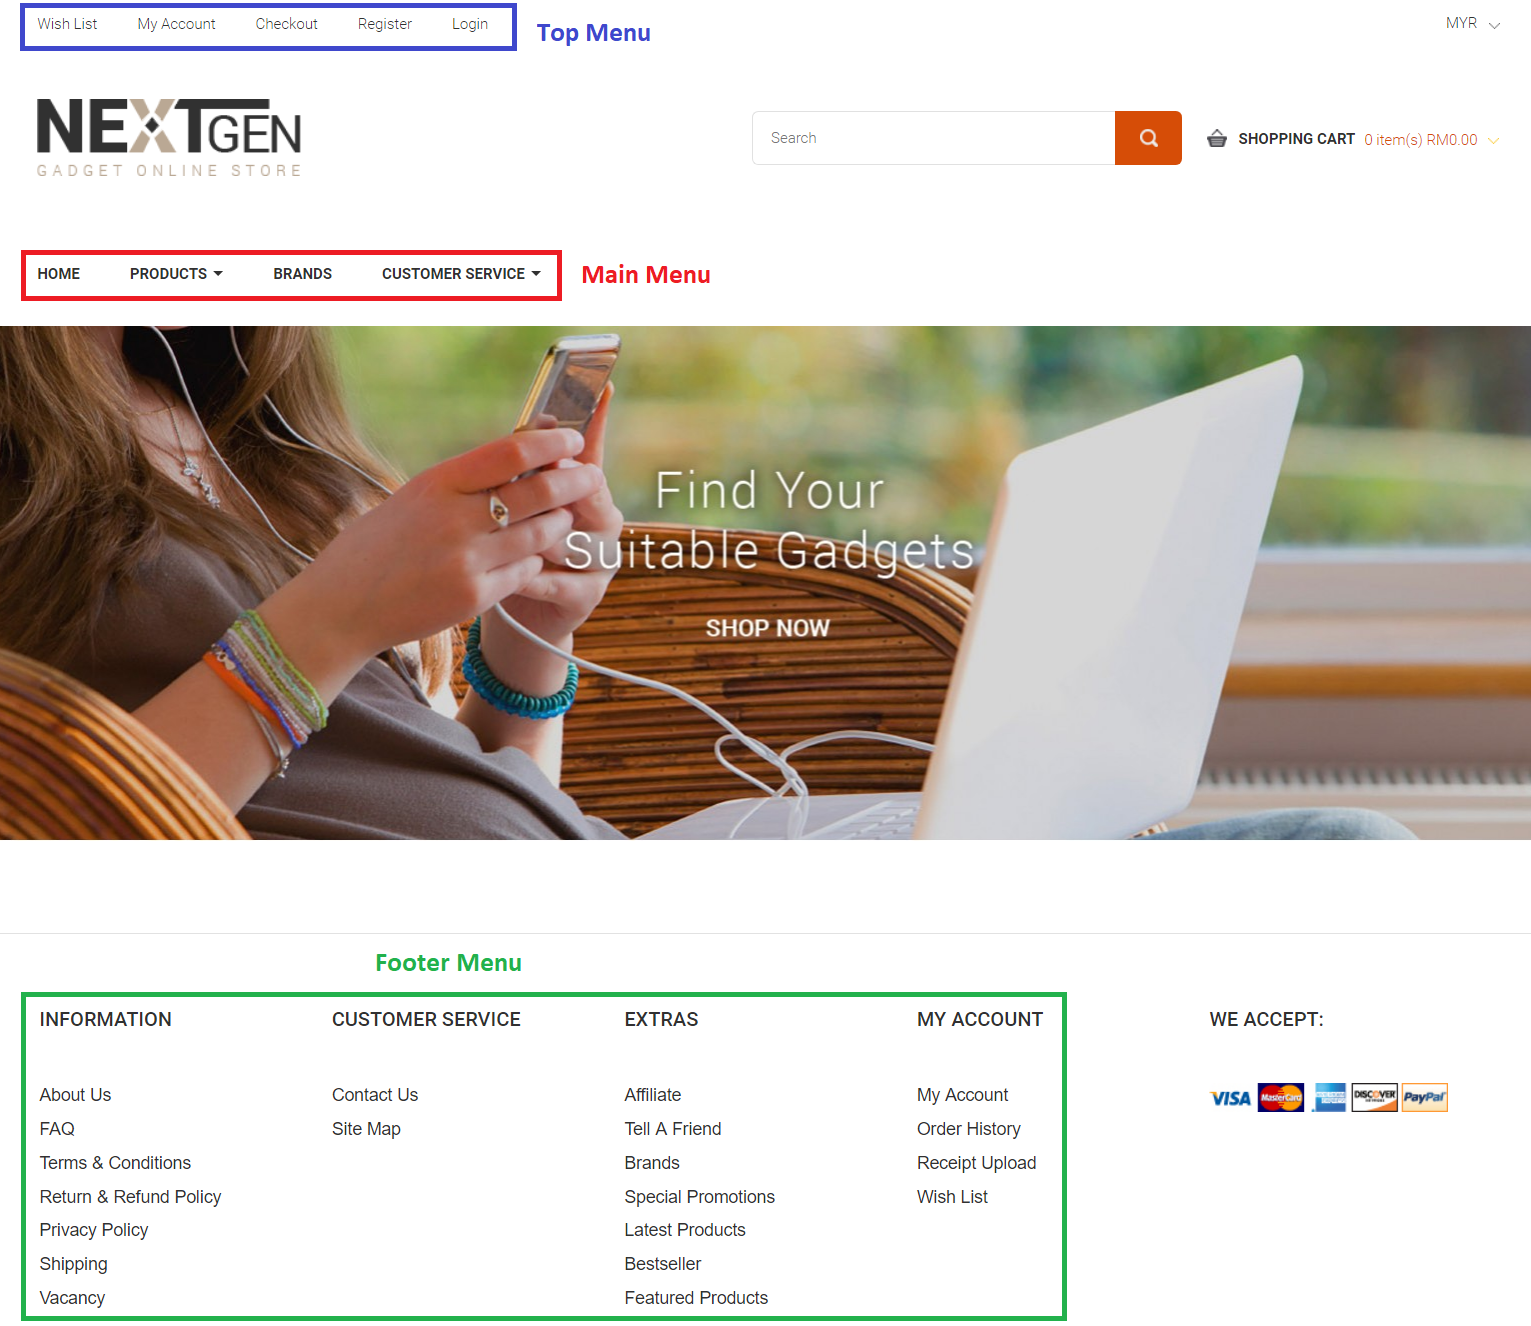
A good online store navigation helps shoppers to find the products or information they desired easily. To create a good online shopping experience, the menu must be well organised.
1. Navigate to Webstore and choose Menu Manager.

2. Determine the menu location you want to display the page.
Note: The position of Top Menu varies according to the template and only applicable to old templates.
3. On the Menu Manager page, click the menu tab to proceed.

4. Click Add Menu button.

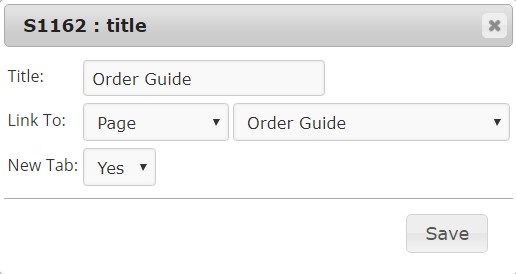
5. New Menu will be generated. Click Edit link.

6. Fill up the menu title to display on your Unicart store and select a page to link to.
7. If you want a new tab to open after clicking the menu, select Yes for New Tab.
There are several pages you can you link to:
- Home: Link to home page.
- Product: Link to a product page to feature the product.
- Category: Link to a category page to list the products to customers.
- Brands: Link to a brand page to list the products to customers.
- Page: Link to a page to display information on your Unicart store. Learn more
- System: Link to a system page such as Special, Latest, Featured page to list the products and so on.
- Custom URL: Link to an external link to your Unicart store. Starts with https://
8. Click Save button.
9. To add a sub menu, drag and drop the sub menu to the bottom of the main menu.

Note:
- Main Menu supports up to two levels of sub menu.
- Sub menu is not applicable on Top Menu.
- Footer Menu supports one level of sub menu.
- A maximum of 2 layers sub menu can be shown at store front only.
10. When it is complete, click Clear Cache to apply changes on your Unicart store.
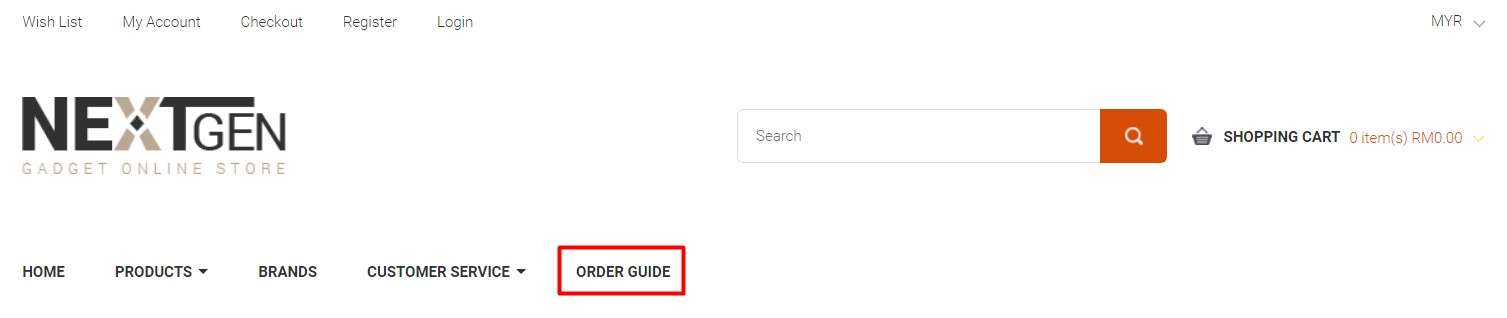
Congratulations! You have successfully added a menu on your Unicart store.
Learn more about how to apply the footer menu in Layout Manager.