You can now sync your online sales orders to SQL Accounting system instead of inserting them one by one manually. With SQL Accounting Sync, you can save labor cost and reduce human error with just a few clicks. After you perform some mapping between Unicart and SQL, then you can sync order transactions to SQL Accounting system to update inventory and do accounting.
Step 1: Set up SQL Accounting integration
Step 2: Perform mapping
Step 3: Sync invoices to SQL Accounting
Step 4: Sync payments to SQL Accounting
Note: Log in to your SQL Accounting Software first before you proceed.
Step 1: Set up SQL Accounting integration
1. Navigate to Apps page, click Add More Apps and install SQL Accounting Sync.
SQL Accounting Sync Order List
The itemized items below are referring to the numbers shown in the image above:-
- Settings: To change the general settings of SQL Accounting Sync. ( see Settings below )
- Product Matching: To insert SQL Accounting Product ID and Product UOM. ( see Product Matching below )
- Customer Matching: To insert SQL Accounting Customer Code. ( see Customer Matching below )
- Shipping Matching: To insert SQL Accounting Code and UOM for shipping cost. ( see Shipping Matching below )
- Payment Matching: To insert SQL Accounting Code, Payment Charge and Payment Min. Charge. ( see Payment Matching below )
- Checked field: You can tick this checkbox to indicate that you have synced and checked in your SQL Accounting Software to make sure everything are correct. This is solely for remark purpose.
- SQL Invoice No. field: To insert the Invoice No. generated from SQL Accounting Software as this is a mandatory field required to perform the Payment Sync and also for your own record purposes.
- Sync Invoice action: To sync invoice to SQL Accounting ( see How to Sync Invoice below )
- Sync Payment action: To sync payment to SQL Accounting ( see How to Sync Payment below )
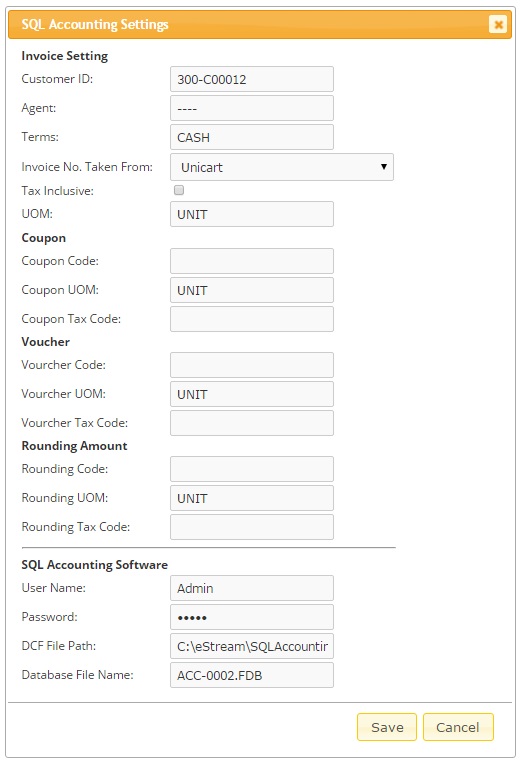
- Customer ID: Set the default Customer ID in the Invoice
- Agent: Set the default Agent the Invoice
- Terms: Set the default Terms in the Invoice
- Invoice No. Taken From: Set the Invoice No. to be taken from either Unicart or SQL Accounting Software
- Tax Inclusive: Set to include tax in the Invoice
- UOM: Set the default UOM of item in the Invoice
- Coupon Code: Set the item code for Coupon
- Coupon UOM: Set the default UOM for Coupon
- Coupon Tax Class: Set the Tax Class for Coupon
- Voucher Code: Set the item code for Voucher
- Voucher UOM: Set the default UOM for Voucher
- Voucher Tax Class: Set the Tax Class for Voucher
- Rounding Code: Set the item code for Rounding Amount
- Rounding UOM: Set the default UOM for Rounding Amount
- Rounding Tax Class: Set the default Tax Class for Rounding Amount
- User Name: Enter your User Name to login to your SQL Accounting Software
- Password: Enter your Password to login to your SQL Accounting Software
- DCF File Path: Enter the System Database Access Path of your SQL Accounting Software
eg: C:\eStream\SQLAccounting\Share\DEFAULT.DCF - Database File Name: Enter the Database File Name of your SQL Accounting Software
e.g. SAMPLE.FDB
Click Save button to save the settings.
Step 2: Perform mapping
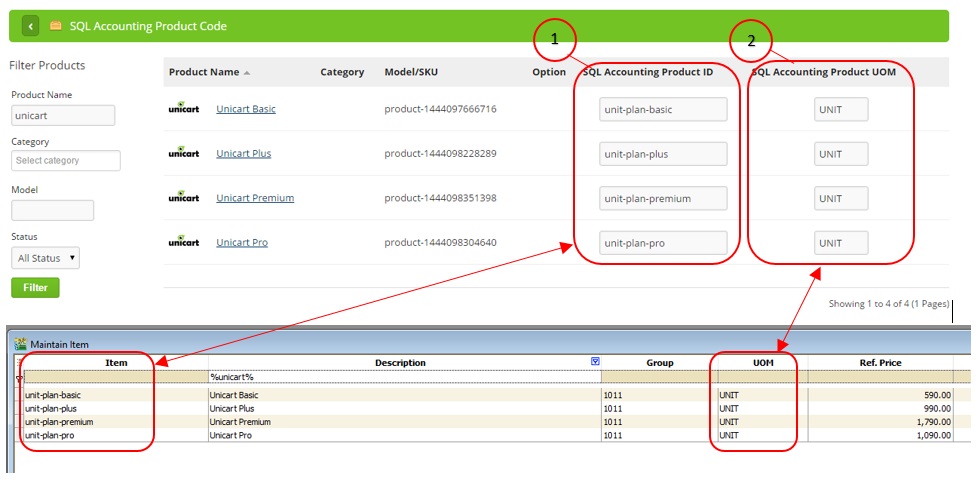
The itemized items below are referring to the numbers shown in the image above:-
- Insert SQL Accounting Item Code into Unicart SQL Accounting Product ID so the same product from both systems can be matched.
- Insert SQL Accounting UOM into Unicart SQL Accounting Product UOM so the same product UOM from both systems can be matched.
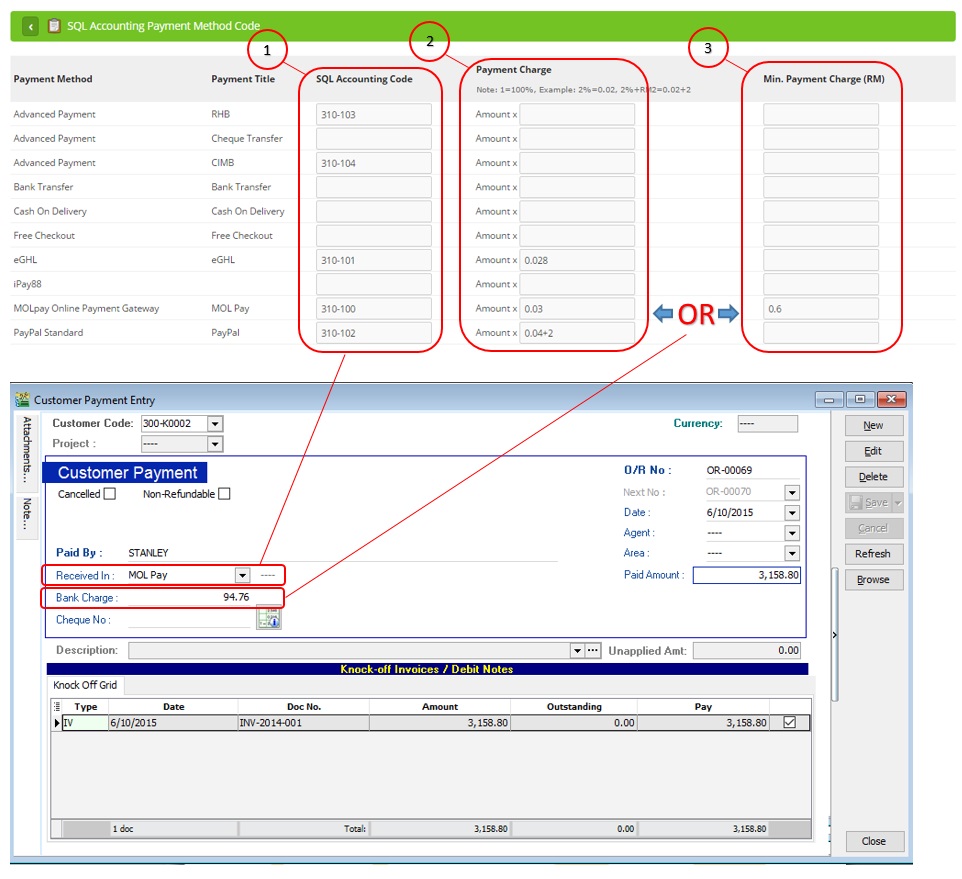
The itemized items below are referring to the numbers shown in the image above:-
- Insert SQL Accounting Code in Unicart to match the Code displayed in “Received In :” in SQL Accounting Software.
- Insert the Payment Charge (Transaction Fee/Surcharge) which will be displayed as “Bank Charge :” in SQL Accounting Software.
- Insert the Min. Payment Charge (Transaction Fee/Surcharge) which will also be displayed as “Bank Charge :” in SQL Accounting Software.
IMPORTANT: If both (2) and (3) are set, the system will get the lowest value as “Bank Charge :”
The itemized items below are referring to the numbers shown in the image above:-
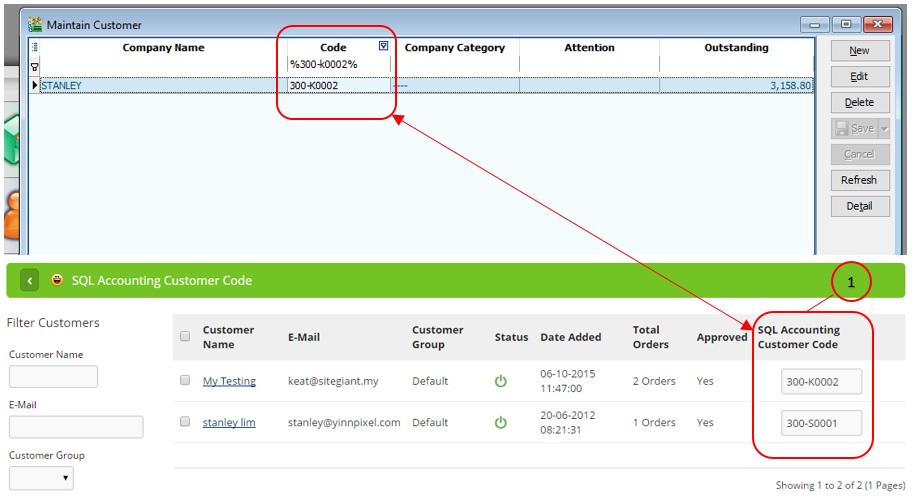
- Insert SQL Accounting Customer Code into Unicart SQL Accounting Customer Code so the same customer from both systems can be matched.
The itemized items below are referring to the numbers shown in the image above:-
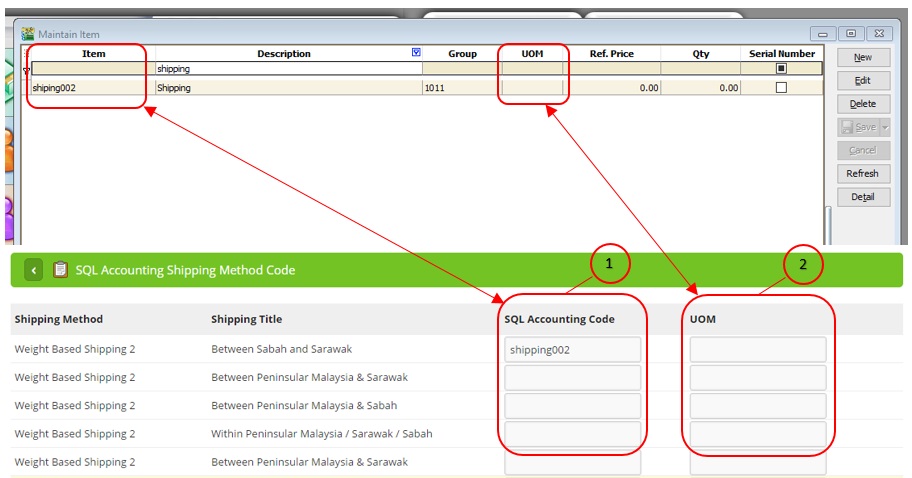
- Insert SQL Accounting Shipping Code into Unicart SQL Accounting Code so the same shipping method from both systems can be matched.
- Insert SQL Accounting Shipping UOM into Unicart UOM so the same shipping UOM from both systems can be matched.
Step 3: Sync invoice to SQL Accounting
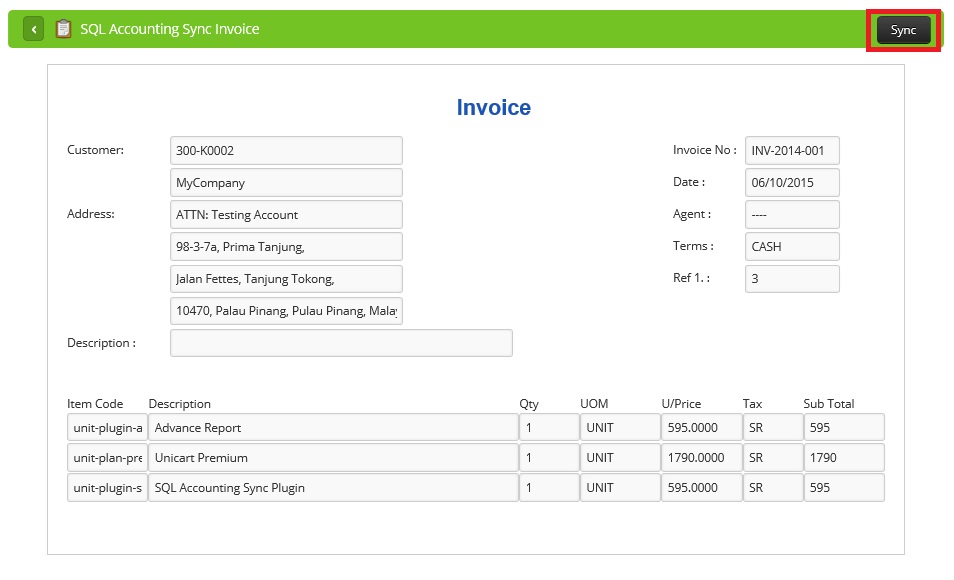
1. Click Sync button located on the top-right hand corner.
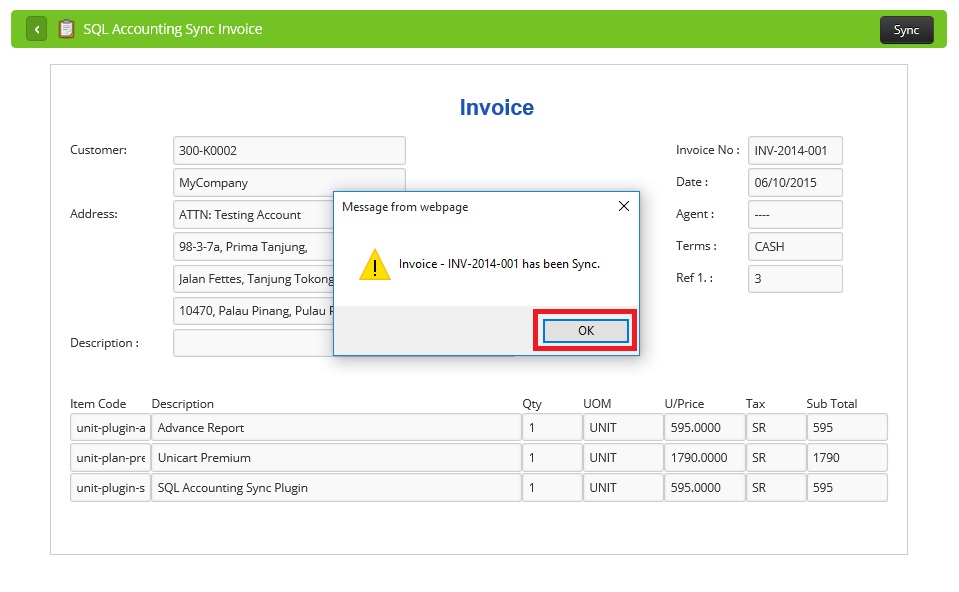
2. Wait for the Sync success popup message as shown below and click OK to close.
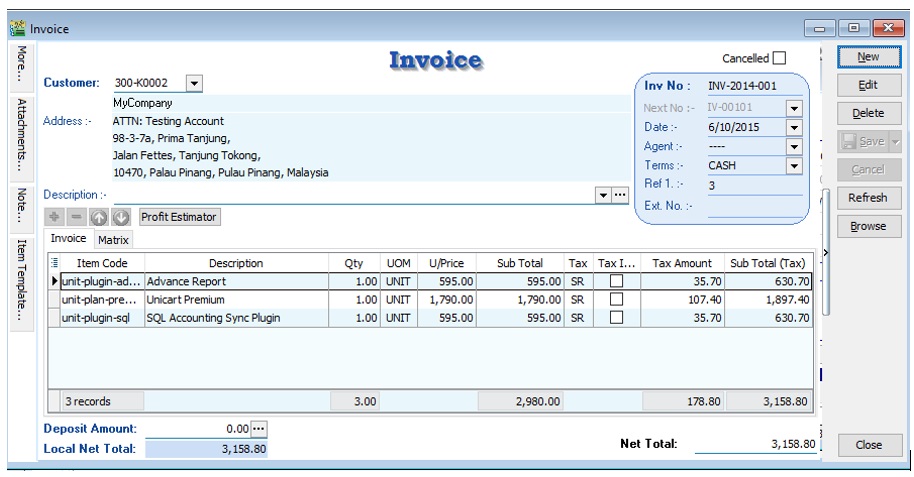
3. After syncing, your invoice will now appear in your SQL Accounting Software. You can double check in there.
Step 4: Sync Payments to SQL Accounting
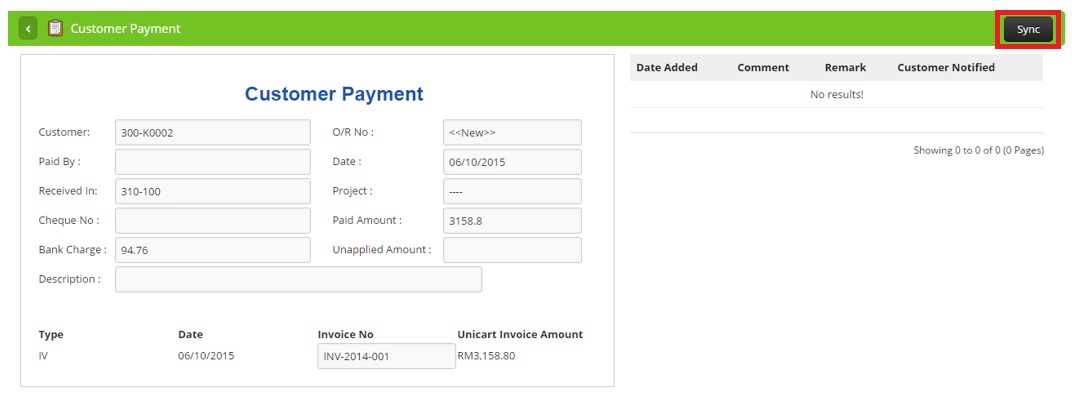
1. Click Sync button located on the top-right hand corner.
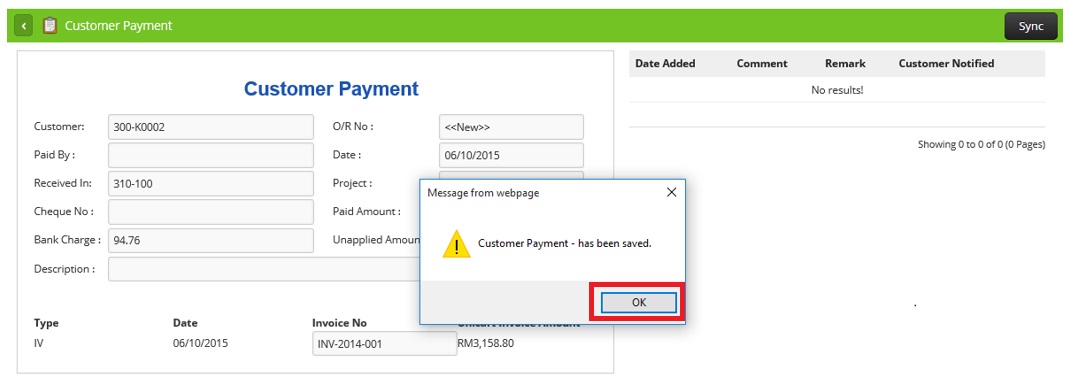
2. Wait for the Sync success popup message as shown below and click OK to close.
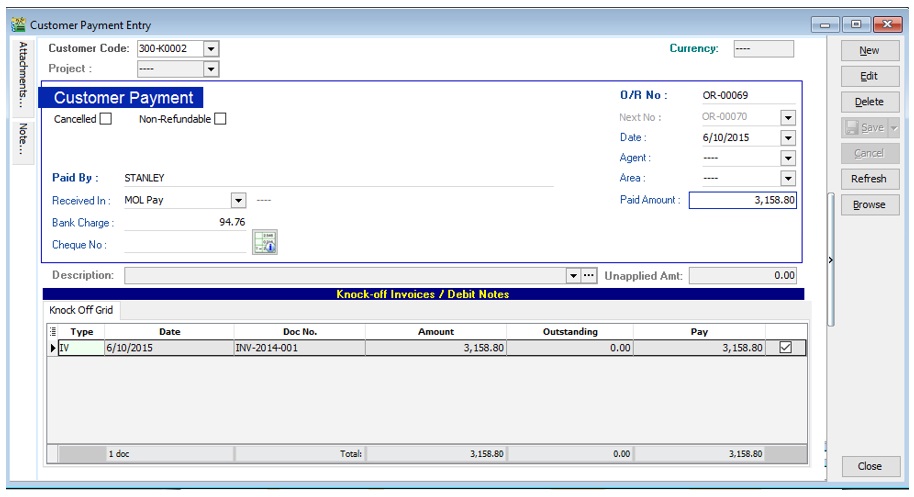
3. After syncing, your customer payment will now appear in your SQL Accounting Software. You can double check in there.

