![]()
Selling online but not using purchase orders?
It may be more important than you think. When there’s a dispute, a disagreement about payment, quality standards or even performance, you need a document for reference. Furthermore, tracking expenses and validating delivery reports would be difficult without purchase orders.
Introducing the Purchase Order App. This webstore app helps you to create and generate purchase orders easily.
This feature is only available in Unicart Business Gold Plus Plan and above.
Step 1: Add Vendor Profile
Step 2: Add Purchase Order
Step 3: Receive Stock
Step 4: Complete the Purchase Order
Additional Information
1. Print Purchase Order
2. Export Purchase Order into CSV File
3. Import Product via CSV
4. Delete Purchase Order
Step 1: Add Vendor Profile
1. Navigate to Products at your Unicart Backend Admin, click on the Purchase Order.
2. Go to More, and select Vendor Profile.
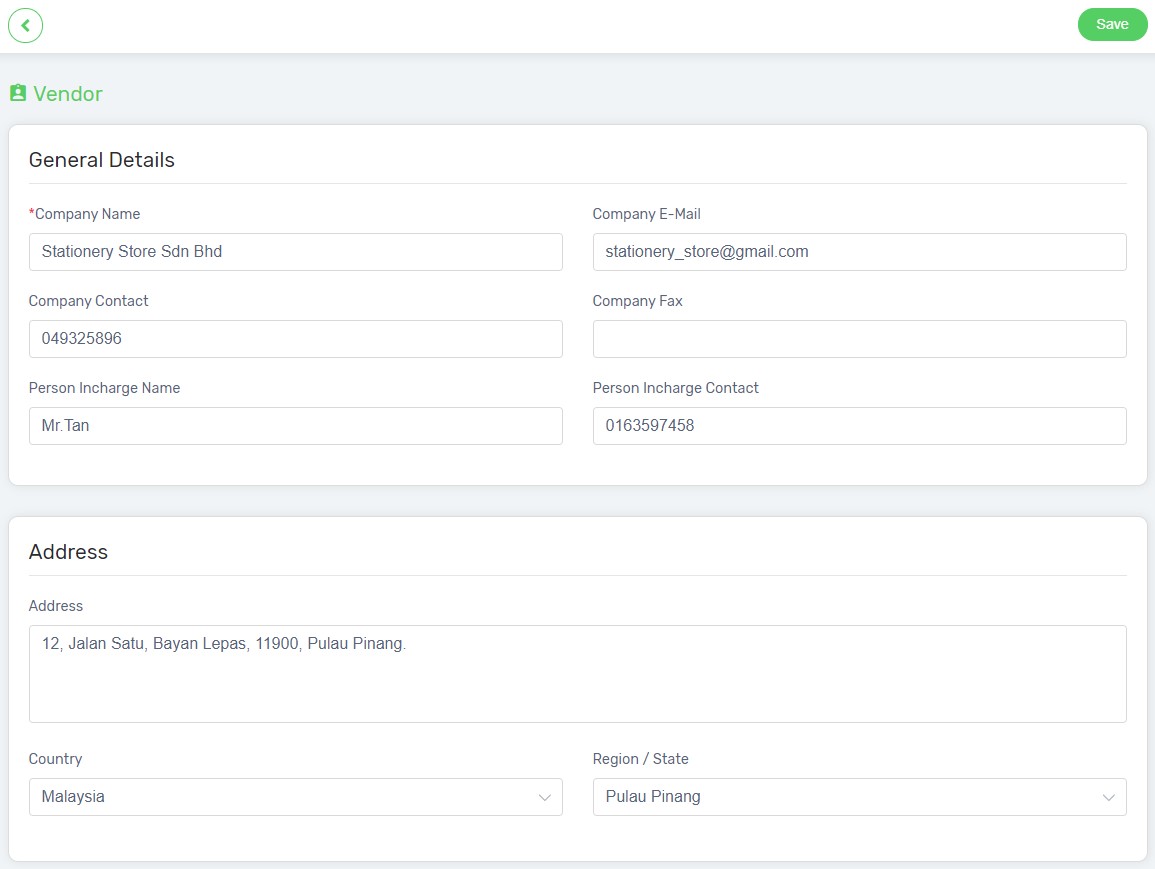
3. Click on the Add Vendor button, to add new vendor profile.
![]()
4. Fill up the vendor information. Hence, click Save to create the vendor profile.
Step 2: Add Purchase Order
1. Go to Purchase Order app.
2. Click on the Add Purchase Order button, to create a new Purchase Order.
![]()
3. Add the product via the Product Name or SKU.

Tips: Use the Product Estimated Restock Time Management to know which product needed to be restock.
Name: Unicart Product’s Name.
Supplier SKU: Product SKU from the supplier side. (Optional)
SKU*: Unicart Product SKU.
Cost: The cost of the product. Probably already pre-fill based on Unicart product page.
Quantity: The quantity that wish to purchase.
4. Insert the Purchase order date and Expected date for the product to be delivered. You may add extra notes for own your references.

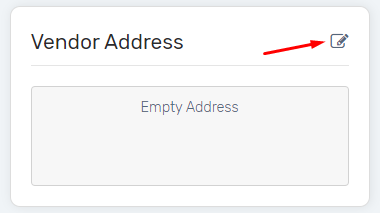
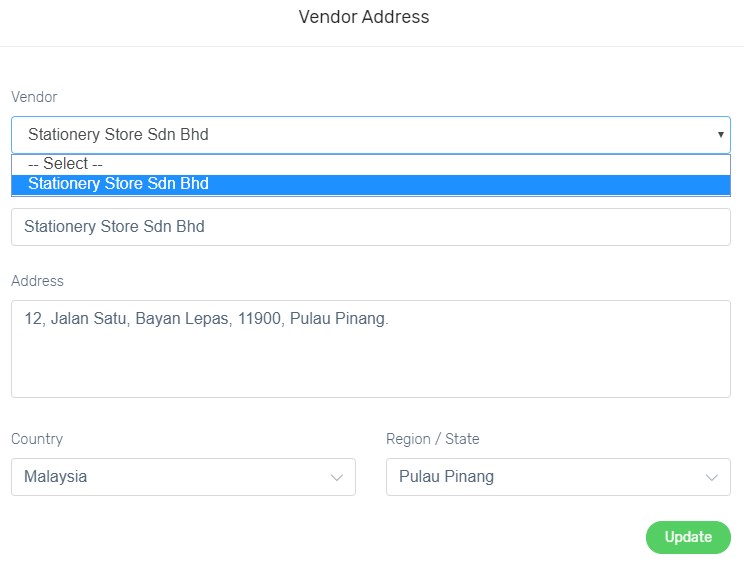
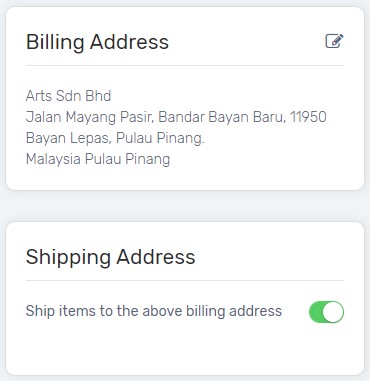
5. Select the Vendor Address by clicking on the edit button. The vendor address can be selected with the Vendor Profile which had created previously.
6. The Billing Address will be auto filled based on the address in your Business Info. While the Shipping Address can be choose whether it to be the same as the Billing Address or manually insert others address.
7. Click on the Save button at the right top to create the Purchase Order.
![]()
Step 3: Receive Stock
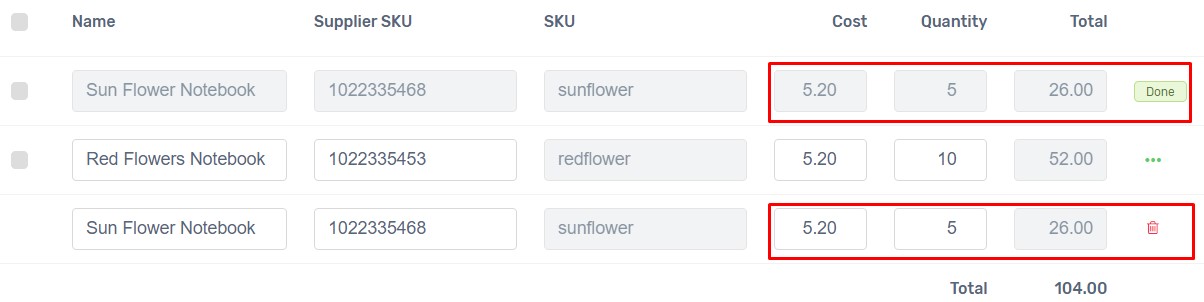
1. Click on the Purchase Order ID to view the order again.
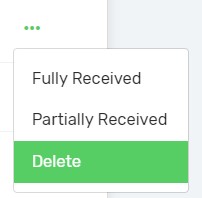
2. Press on the More button of each product, hence choose the stock receive option.
i. Fully Received
Select “Fully Received” for the product where the stock had already fully delivered to you.

Note: Once the product is marked as received, the quantity will be auto updated to the Unicart and Marketplaces inventory.
ii. Partially Received
Select “Partially Received” for the product which the stock is partially delivered, hence keep track the stock which had already received.

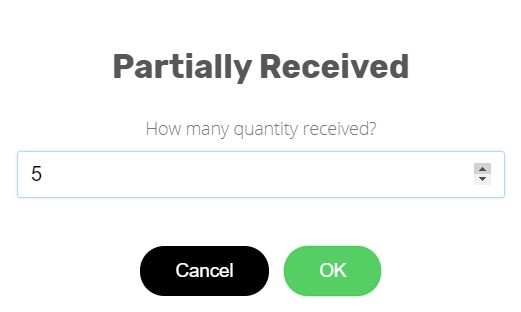
Note: Once the product is marked as received, the quantity will be auto updated to the Unicart and Marketplaces inventory.
iii. Delete
Select “Delete” if you wish to remove the product from the Purchase Order.
3. Click on the Save button at the right top to save the changes made for the Purchase Order.
![]()
Step 4: Complete the Purchase Order
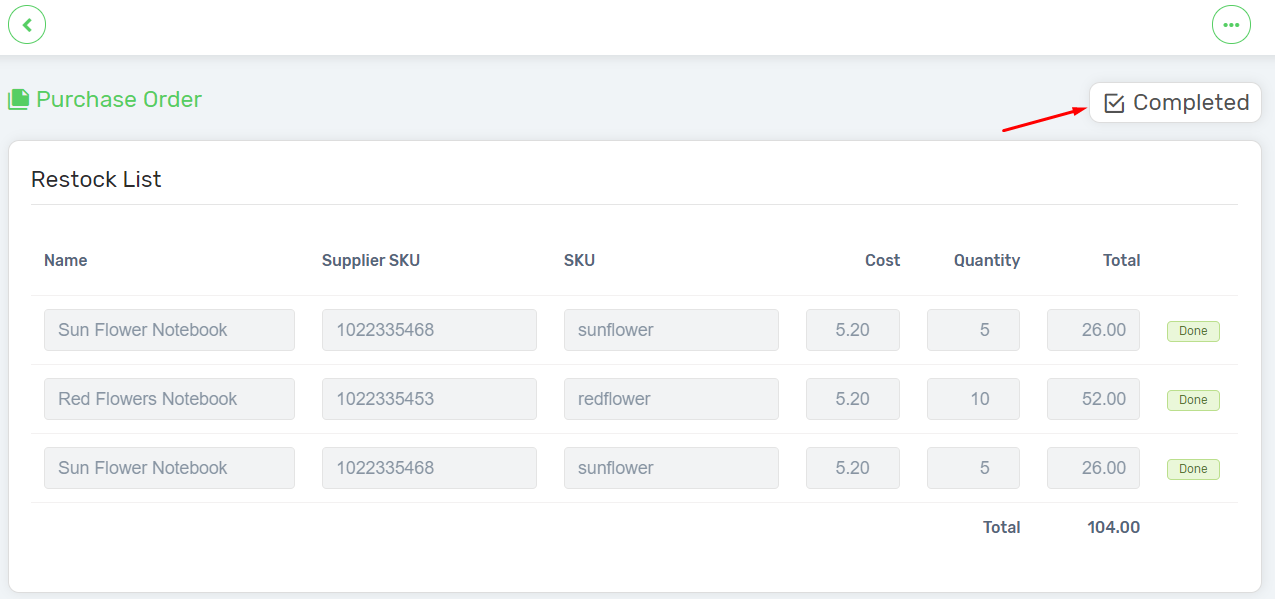
1. Once all the products had fully received, click on the Mark as Completed button to complete the Purchase Order.
![]()
2. The status will then be shown as Completed.
Additional Information
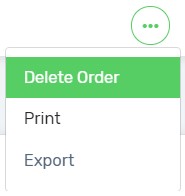
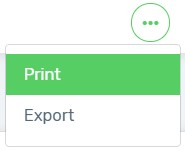
1. Print Purchase Order
Select on More and choose Print, to print out the Purchase Order.

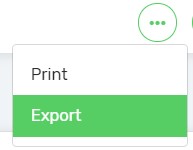
2. Export Purchase Order into CSV File
Click on More, and Export the Purchase Order into CSV file for record purpose.
3. Import Product via CSV
Click the Import Restock Products button at the top in order to import the product via CSV in the Purchase Order.
![]()
Download the Sample CSV file. Thus, fill up the information based on the format and import the file.
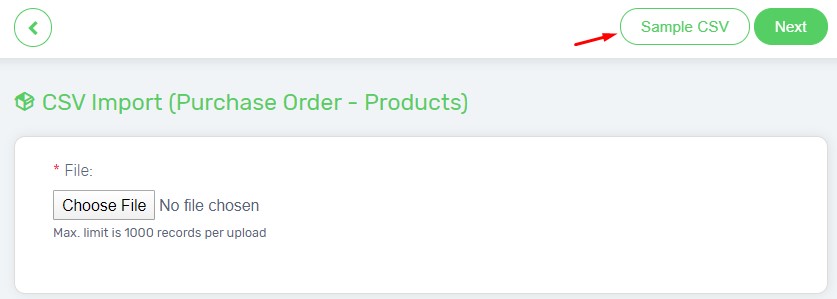
Note: Vendor Address and Purchase Order Details must be filling up first to create a new purchase order before proceeding to import the restock products list.
4. Delete Purchase Order
For Purchase Order where the products are not yet to be marked as received, will be able to Delete via the More button.